Welcome to Week 1 of the Scheepjes Crochet in my DNA MAL! Please read the introduction first and then come back to read this weeks information and get started! Make sure you’ve made your swatches! Grab your yarn, a bit of patience, a bucket of motivation and get hooking :)!
Voor de Nederlandse versie van dit bericht: Week 1 Nederlands.
 1")
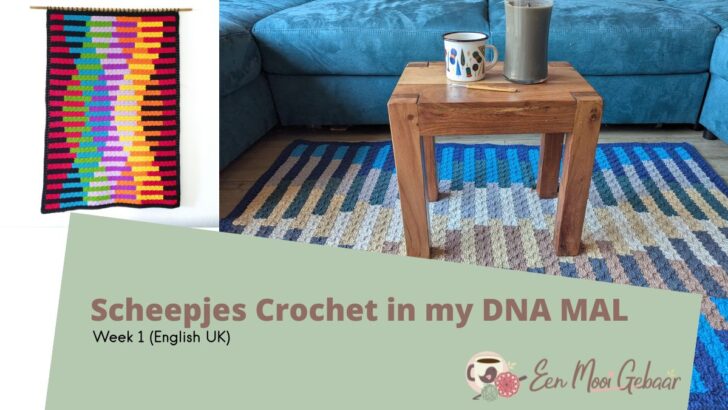
Speed Scheepjes Crochet in my DNA MAL
We are not doing that much this week on purpose. I have very consciously chosen this after years of experience with all kinds of CALs. My experience is that people really want to keep up. Also, the experience is that especially in the first two weeks, many questions come up about a new project or a new technique.
That is why we have chosen to crochet one strip of the project this week: the very bottom edge of the crochet pattern. For some that will be too little, they will have to be patient for a while before we release the entire bottom half next week. (Or they can buy the PDF crochet pattern via the button below and continue in one go):
For others, such a calm first week ensures that they approach the entire project with confidence and courage, and that is exactly my intention.
Facebook groups
Are you having trouble after reading all the information and watching the YouTube Videos (those of the swatches last week and this weeks extensive tutorial)? Or do you want to show your progress and colours? Please join us in the cozy Scheepjes International Facebook Group!
Terminology
To follow along easily with this pattern, it’s nice if you understand the terminology I’m using. I might use “crochet project” or perhaps “blanket” or “wall hanger”, but I mean the same thing: the gorgeous Crochet in my DNA MAL from Scheepjes, designed by Hook to Hook and put into practice by Een Mooi Gebaar.
 2")
We’re going to crochet our project from the bottom to the top. We’re NOT going to crochet diagonally with lots of bobbins, like is custom for C2C, but we’re gonna crochet colour by colour.
Each horizontal line in the project, I’ll call a strip. Each strip is made up of 5 pieces of one colour. Each piece in one colour will be called panel. There are two colour combinations of 5 panels, which keep alternating, from the bottom to the top. Each panel is 2 blocks high, but the width of the panels change, making the gorgeous DNA Helix feeling of this crochet project.
 3")
Each block (I’ve circled a few at random in the picture above) is a combination of chain 6 and 3 treble crochet, or of chain 3 and 3 treble crochet. Blocks are attached with slip stitches. Those are the three stitches you’ll need for this entire project: chain, treble crochet and slip stitch.
It’s important to pay attention to the direction (horizontal/vertical) of the blocks. Blocks adjacent to one another, should never have the same direction. It’s also important that the orientation (front/back) of the treble crochets alternates. The front of the treble crochets in one block is always blocks with the back of the treble crochets facing. In this picture below you see in blue: horizontal treble crochets, seen from the front. In orange in the picture below, you see vertical treble crochets, viewed from the back. Diagonally the blocks always have the same direction and orientation.
 4")
Not sure you get it? Please watch the YouTube video, I’ll show you multiple times what to pay attention to and how it looks.
Stitches used
- Chain: yarn over and pull through the loop.
- Treble Crochet: Yarn over, insert hook into stitch or space, yarn over and pull up a loop. You have 3 loops on the hook now. Yarn over and pull through 2 loops. You have 2 loops on the hook now. Yarn over and pull through both loops.
- Slip stitch: insert hook into stitch or space, yarn over and pull through stitch/space and loop on the hook.
Start
Do you have all your materials? Ready to go?
 5")
Colors I used for the wall hanging in this photo tutorial, with the yarn Scheepjes Scrumptious. So nice to see them together like this, it always makes me want to start right away!
Strip 1 – Panel 1: 2 blocks high, 6 blocks wide; Colour A
I use the word “strip” for one horizontal line on the drawing, which is 2 blocks high. One strip always has 5 colours. Each piece of 1 colour is called a “panel”. A “block” is a combination of chain 3 and 3 treble crochet (or 2 chain and 3 half treble crochet if you use Mini C2C).
Panel 1 – Row 1
Slip knot with Colour A.
 6")
Chain 6
 7")
Treble crochet into the 4th chain from the hook. Do you see where the needle is pointing in the photo below? That’s the 4th chain from the hook.
 8")
Treble crochet into the next chain. The needle is pointing at it in the picture below:
 9")
Treble crochet into the last chain. Do you see the needle in the photo below? The last chain is actually the first chain you made (confusing, no?), just besides the knot of the slip knot.
 10")
Your first block is done. Leave the beginning yarn be, this is the bottom corner of your work, you’ll be able to recognize where you started from this little yarn end.
 11")
Panel 1 – Row 2
Chain 6
 12")
Treble crochet into the 4th chain from the hook. Do you see the needle in the picture below? That’s where the first treble crochet of this new block will come.
 13")
Make a treble crochet into the next chain. The needle below shows which one that is:
 14")
Treble crochet into the last chain. It’s at the cross over between the two blocks. The needle is in it in the picture below:
 15")
This is what your work looks like now:
 16")
This is the point where many people falter a bit with the Corner to Corner technique. Flip the first block you crocheted up, so that there are 2 blocks next to each other. Your hook is now next to the rounder side of the first block. The first block is now visible from the back, the second still from the front. The second block now has vertical treble crochets, the first now has horizontal blocks. Is that correct?
 17")
The needle in the photo below is pointing to the chain space. This is the space between the 3 chain of the starting chain 6 and the first treble crochet you made for the first block. This is called the chain space. Slip stitch into this space.
 18")
Chain 3
 19")
3 treble crochet into the same chain space.
 20")
This is what your work should look like now, we’ve already reached the height of this strip.
Panel 1 – Row 3
The height has been reached. You are not going to start with 6 chains, but you are going to turn. This is not necessarily decreasing (after all, you are crocheting 2 blocks in this row and not just 1), but it is not increasing either. I call it “stopping increasing”.
Chain 3 and turn
 21")
Slip stitch into the chain space of the last crocheted block (that is the block that your 3 chains are also attached to). Then rotate the block a quarter, to end up as in the picture below.
 22")
Chain 3, 3 treble crochet into the same space
 23")
Slip stitch into next chain space, see needle in this picture:
 24")
Chain 3, 3 treble crochet into the same space
 25")
Panel 1 – Row 4
We’re making a panel of 2 high and 6 wide. This means we’ll keep increasing on one side, but not on the other. We’ll alternate between a row of increasing and a row of not-increasing. To increase, we start with chain 6, to not-increase we start with chain 3 and turn, like we did in row 3.
Chain 6 and turn
 26")
Treble crochet into the 4th chain from the hook (see needle in picture below), treble crochet into 5th chain from the hook, treble crochet into 6th chain from the hook.
 27")
Slip stitch into chain space of previous block (see needle in the picture below).
 28")
Chain 3, 3 treble crochet into the same space.
 29")
Slip stitch into next chain space (see needle in the picture below).
 30")
Panel 1 – Row 5
Chain 3 and turn your work
 31")
Slip stitch into the chain space of the last block. That chain space is shown by the needle in the picture below. You have to turn your work so that it looks like this picture:
 32")
Chain 3, 3 treble crochet into this chain space (see needle in the picture)
 33")
Slip stitch into that chain space (see needle in picture below). Chain 3.
 34")
3 treble crochet into the same space.
Panel 1 – Row 6
Chain 6, turn. Treble crochet into 4th, 5th and 6th chain from the hook. Turn your work so your hook is next to the chain space of the previous block. Slip stitch into that chain space.
 35")
Chain 3, 3 treble crochet into the same space.
 36")
Panel 1 – Row 7
Slip stitch into next chain space and chain 3. Turn your work.
 37")
Slip stitch into chain space of the same block. Chain 3, 3 treble crochet into the same space.
 38")
Slip stitch into chain space, chain 3. You’ve reached the width of your first panel. Turn your work.
 39")
Slip stitch into the chain space of the last made block.
 40")
Chain 1. Cut the yarn
 41")
Pull through. We can darn in the end now (your work should be 2 blocks high and 6 wide).
 42")
Put your yarn end in a needle and pull through the chain 3 of the last block and the block below it.
 43")
And through the treble crochets of the last block. (Do this at the end of every colour). Leave the beginning yarn be for now
 44")
Strip 1 – Panel 2: 2 blocks high and 12 blocks wide: Colour B
This is where you’re going to change colour. You want to pay attention to where the beginning end of the yarn is. We’ll crochet into the corner. This is at the bottom of the panel. Directly across from where you fastened off and directly across from where you started (see needle in picture below)
Panel 2 – Row 1
 45")
Insert your hook in this corner hole and pull a slip knot of Colour B through this hole.
 46")
Chain 1 with double yarn (so the slip knot end and the yarn attached to the ball. This is to secure your end a little already)
 47")
Chain 2 with yarn like normal. Turn
 48")
Slip stitch into the slip stitch between two blocks on the short side of panel 1 (see needle)
 49")
Chain 3. Turn
 50")
3 treble crochet into the chain space you just made. You’ll put your hook under the chains you just made of the Colour B, not under the chain space of Colour A/Panel 1. (See needle in picture below for correct placement).
The block you just made, is in opposite position of the block adjacent to it from panel 1. The new block has horizontal treble crochet when it’s “in the proper position” and the block next to it, belonging to panel 1, has vertical treble crochets.
 51")
Panel 2 – Row 2
Chain 6. Turn.
 52")
Work away your end, pull it through the bottom of your treble crochet, like so:
 53")
…and also through the chain 3 from the chain space. (This is what you do with each and every colour change).
 54")
Make a treble crochet into the 4th, 5th and 6th chain from the hook.
 55")
Slip stitch into the chain space of the first block of this colour. Chain 3, 3 treble crochet into the same space, slip stitch into the corner hole of the previous panel (see needle)
 56")
Panel 2 – Row 3
Chain 3, turn
 57")
Slip stitch into the chain space of this same block, chain 3, 3 treble crochet into the same space.
 58")
Slip stitch, chain 3, 3 treble crochet into the next chain space
 59")
Panel 2 – Row 4
Chain 6, turn, double crochet into the 4th, 5th and 6th chain from the hook. Turn. Slip stitch into chain space of previous block, chain 3, 3 double crochet into the same space. Slip stitch into the next chain space. Chain 3, turn.
 60")
Panel 2 – Row 5-12
Carry on like you’ve done so far. When you’ve reached 12 blocks on the bottom side, you need to make one last block. Chain 3, turn.
 61")
Panel 2 – Row 13
Slip stitch into the chain space of the last block you made. Chain 3, 3 treble crochet into the same space. Slip stitch into next chain 3 space. Chain 3, turn, slip stitch into the chain space of the last made block. Chain 1, cut yarn.
 62")
Your second panel of strip 1 is now finished. Don’t forget to darn in your ends.
 63")
Strip 1 – Panel 3 and 4: 2 blocks high, 12 blocks wide per panel; Colour C and then D
 64")
Panel 3 and 4 are made exactly the same as panel 2, but you attach them on another panel. Panel 3 is attached to the bottom corner of panel 2, panel 4 on the bottom corner of panel 3. Panel 3 is made with Colour C, panel 4 is made with Colour D.
 65")
Strip 1 – Panel 5: 2 blocks high and 16 blocks wide; Colour A
Panel 5 is crocheted in Colour A again. You attach it in the same fashion as you did for panel 2-4. This strip is wider than the others: 16 blocks wide.
 66")
This is what it should look like now
 67")
Darn in the ends, but keep the first end attached, so you know where the bottom of the project is. Strip 1 is done!
Share your work
Belangrijke links bij dit project
- Nederlands
- English US
- English UK
- YouTube
- YouTube Channel
- Nederlandse Proeflapjes
- English Swatches
- YouTube Channel
 68")
Creatieve, enthousiaste en lieve Iris van Meer is het gezicht achter Een Mooi Gebaar en vertaalt, ontwerpt en deelt meer dan duizend haakpatronen met jullie op dit stukje internet.
Mijn verhaal, over hoe ik van onhandige knutselaar toch nog creatieve ondernemer ben geworden, lees je hier: Mijn Verhaal
Als je contact met Iris wil opnemen, ga je naar de contactpagina