The corner to corner stitch is a lovely technique with which you can make beautiful blankets with a very dense structure. This crochet pattern gives you all you need to make your own beautiful gingham blanket. Thank you for buying this PDF, it helps me turn my hobby into my job and allows me to keep designing crochet patterns. Thank you!
The example blanket is made with three colours Baby Merino yarn, with hooksize 2.5 mm. You can make the blanket with any yarn and material type. If you know how to read, and can make chains, slip stitches and double crochet, you can make this blanket!
Voor de Nederlandse versie van dit patroon, klik je hier.
Click here to buy the ad-free PDF-version of this pattern!
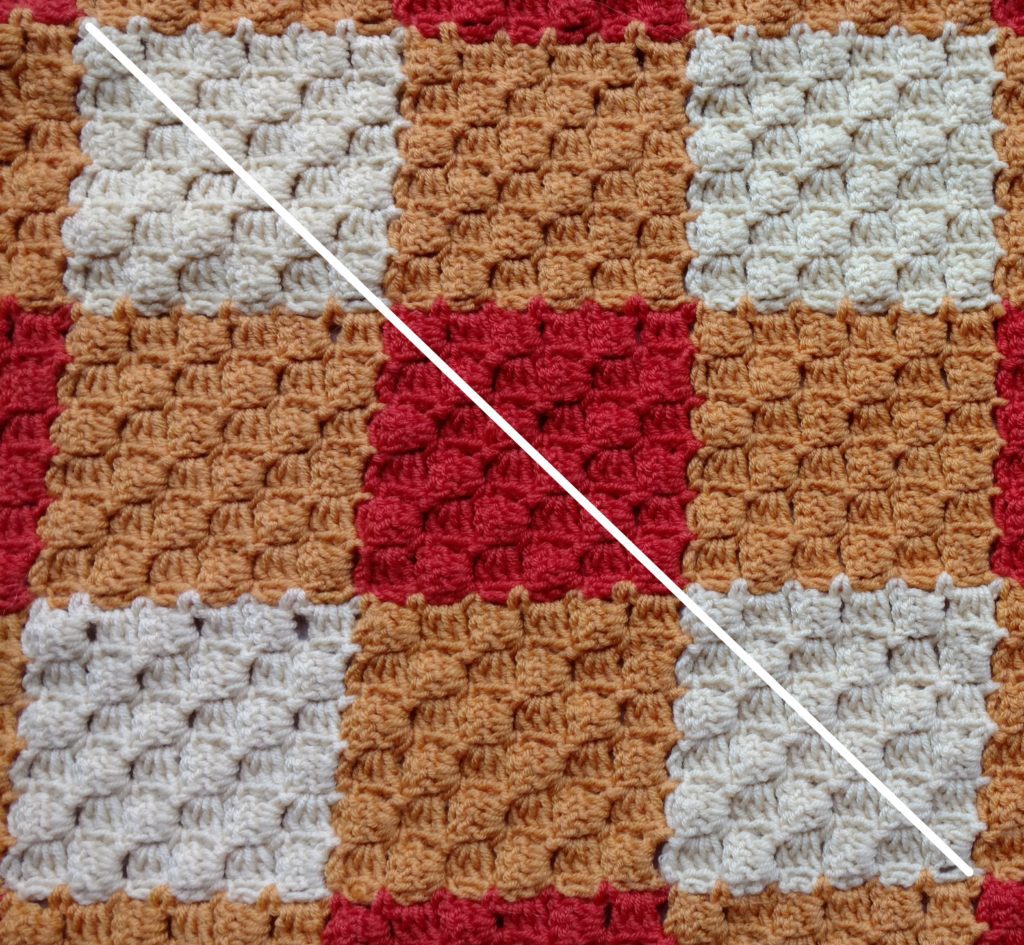
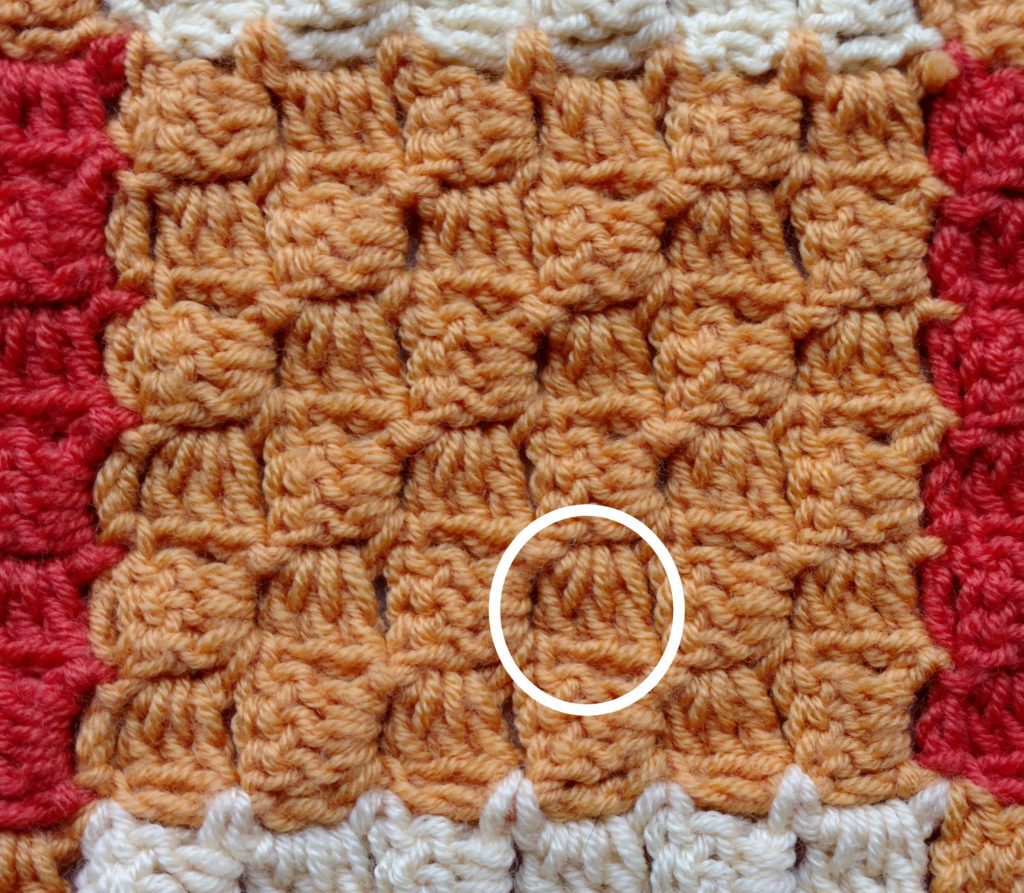
In this pattern, I will talk about “rows”, to indicate the diagonal lines that characterize corner to corner. You see the white line? That’s a diagonal row, and in it, all blocks (see white circle) have the same orientation (right side or wrong side facing) and the same direction (horizontal or vertical). The block in the white square is vertical and right side facing, as are all blocks diagonal to it. The blocks next to it in non-diagonal directions are all the polar opposite: horizontal wrong side facing. This is important for the blanket, I’ll mention it a few times. My squares all have 6 blocks horizontal and 6 vertical. You could make this blanket with fewer or more blocks in each square, but I’d recommend you to try this version out first to get the hang of the technique.
Are you happy with the result? Wanna share? You can share through @eenmooigebaar op Instagram, or on Facebook. Please feel free to ask questions or say hello!
Stitches Gingham Blanket
I’m using US terminology here: so everywhere you read “Double crochet” you should read “treble crochet” if you’re used to UK terminology. Confusing? If you buy the PDF, you get to choose between US and UK terminology.
Chain: yarn over and pull loop through loop on the hook.
Double crochet: Yarn over, insert hook into stitch or space, yarn over and pull up a loop. (You have 3 loops on the hook now). Yarn over and pull through 2 loops. (You have two loops on the hook now). Yarn over and pull through two remaining loops.
Slip stitch: insert hook in stitch or space, yarn over and pull the loop through the space/stitch and through the loop on the hook.
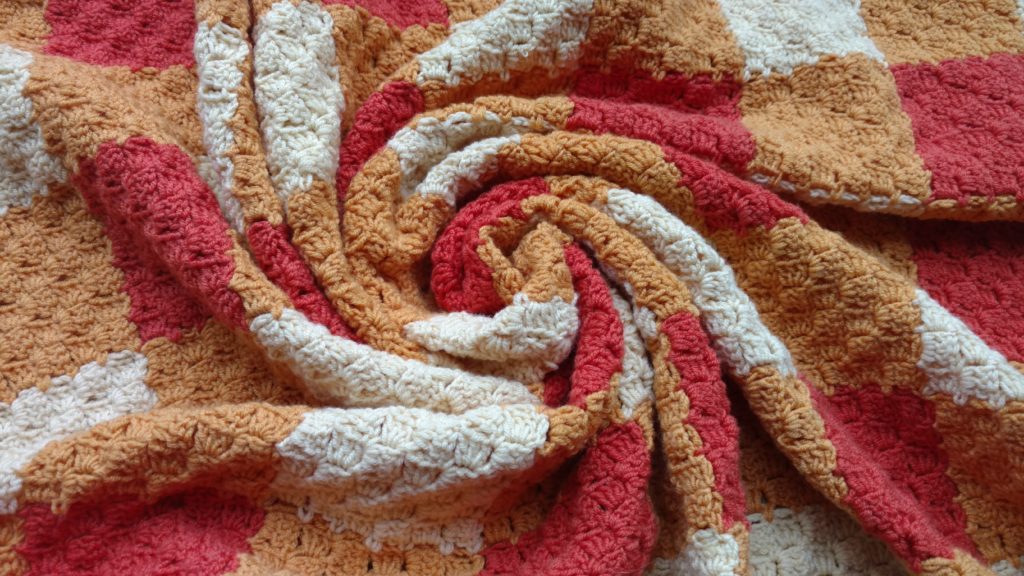
We start with the bottom most right corner of the blanket. Then we’ll make the bottom strip of the blanket. And then we’ll continue adding horizontal strips until we have the desired length.
Square 1
Row 1
Chain 6.
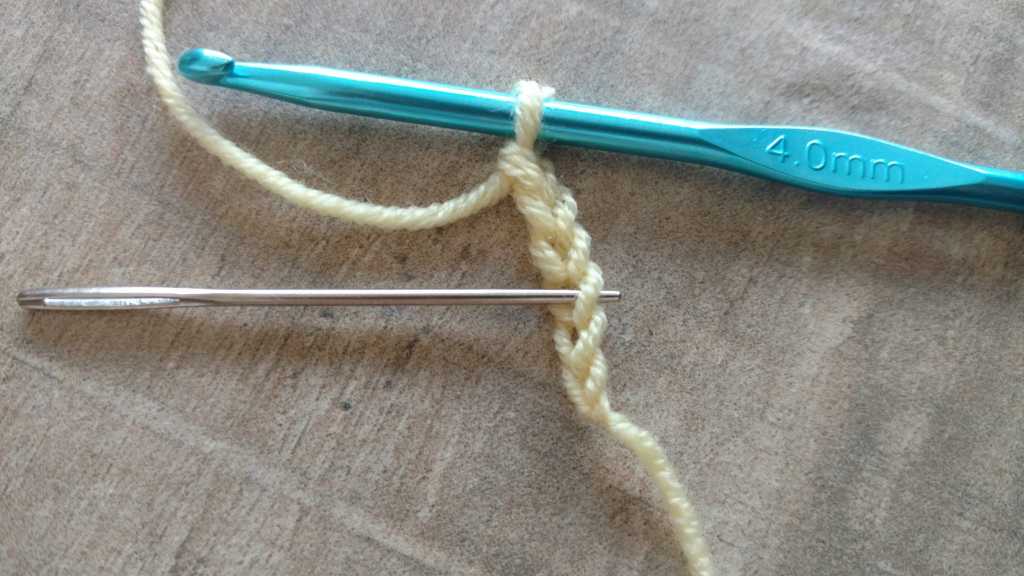
Double crochet into the 4th, 5th and 6th chain from the hook. The 4th chain is indicated with the needle in the picture, you see?
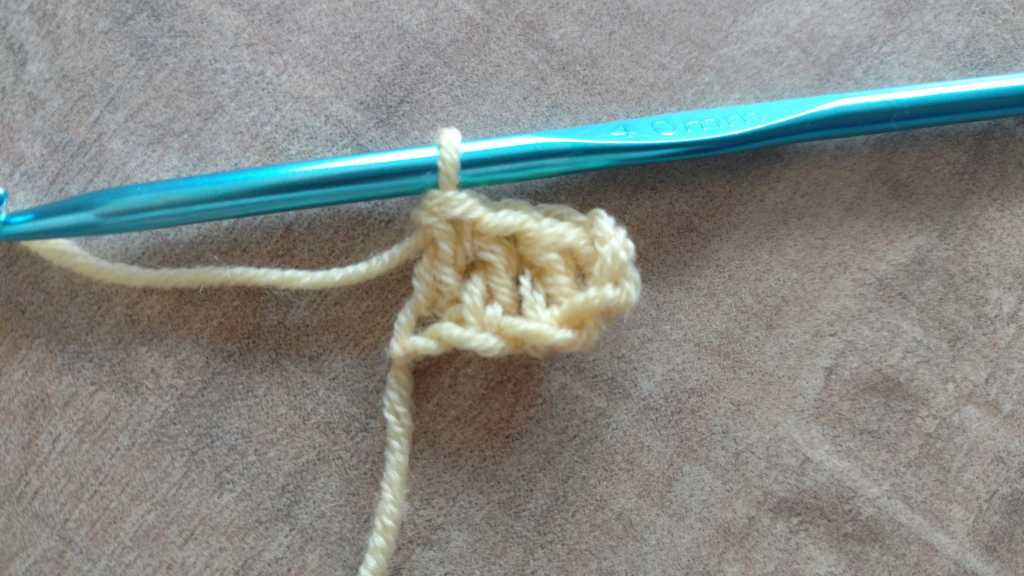
That was the first block. The first row is finished too. Easy, no?
Row 2
Chain 6. Double crochet into 4th, 5th and 6th chain from the hook.
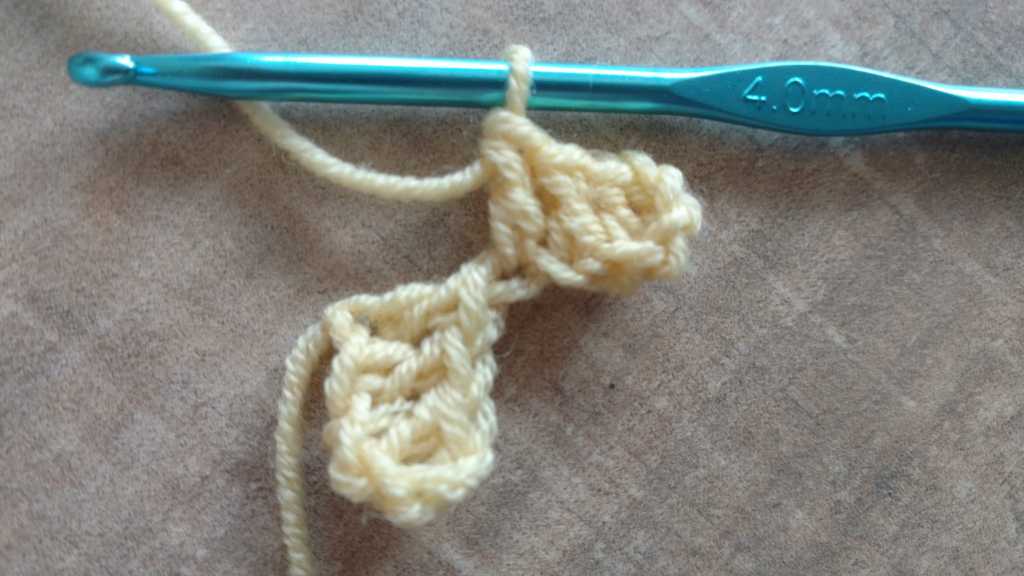
You have two blocks now. Flip the first block, from row 1, upwards. Slip stitch into the 3-chain space of the first block.
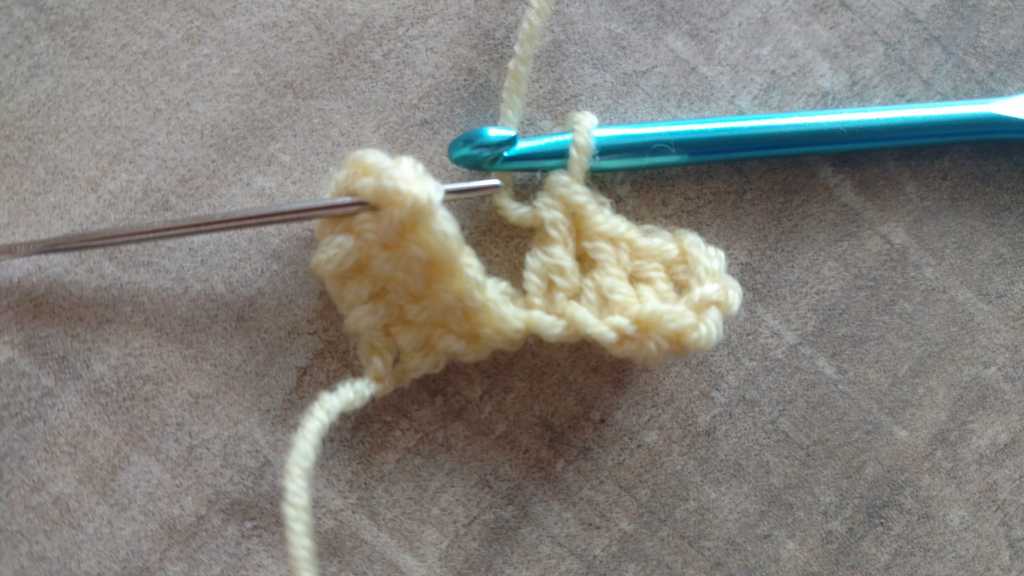
Chain 3.
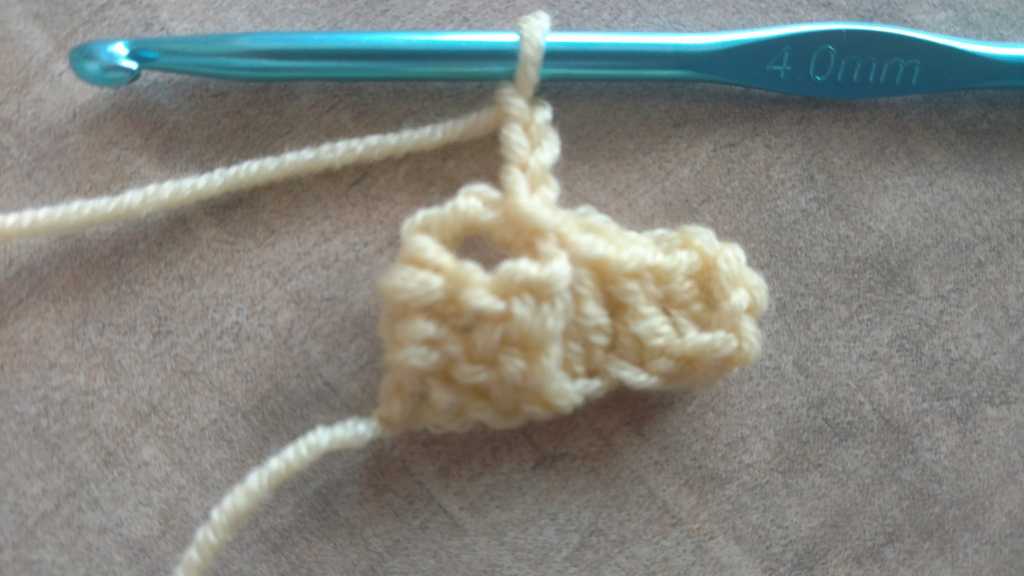
3 double crochet into the same space. Your second row is done now!
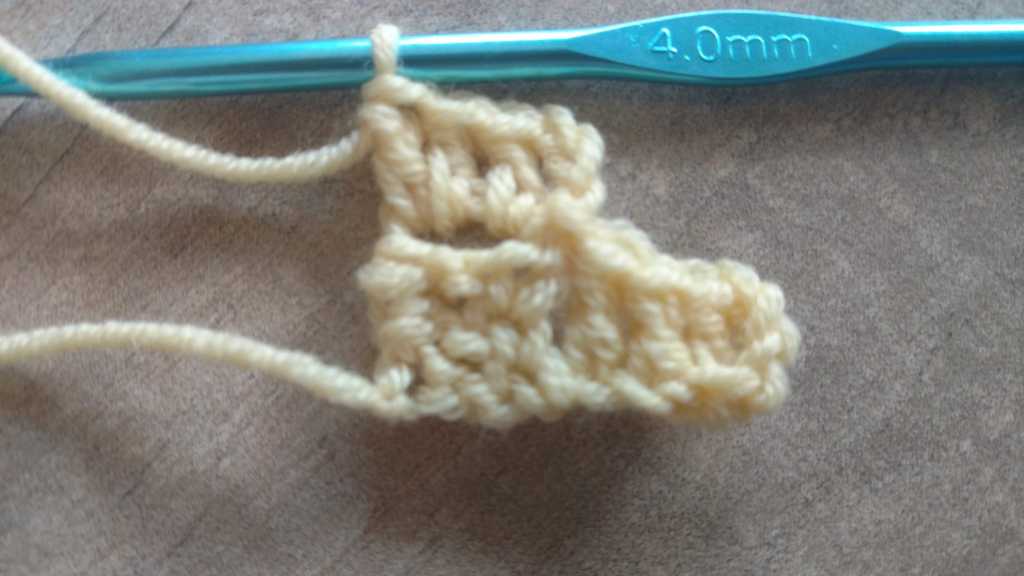
Row 3
Chain 6.
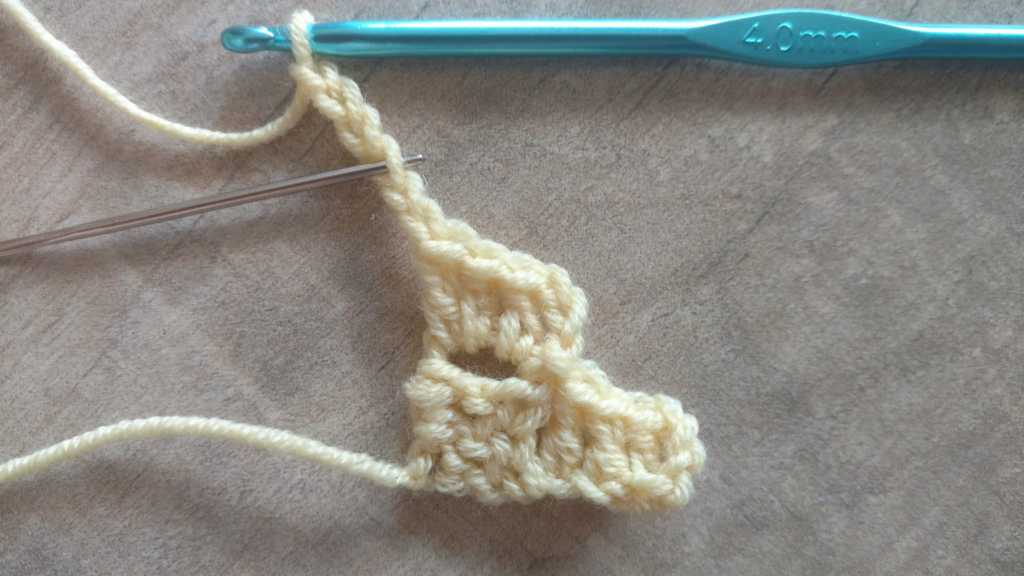
Double crochet into the 4th, 5th and 6th chain from the hook.
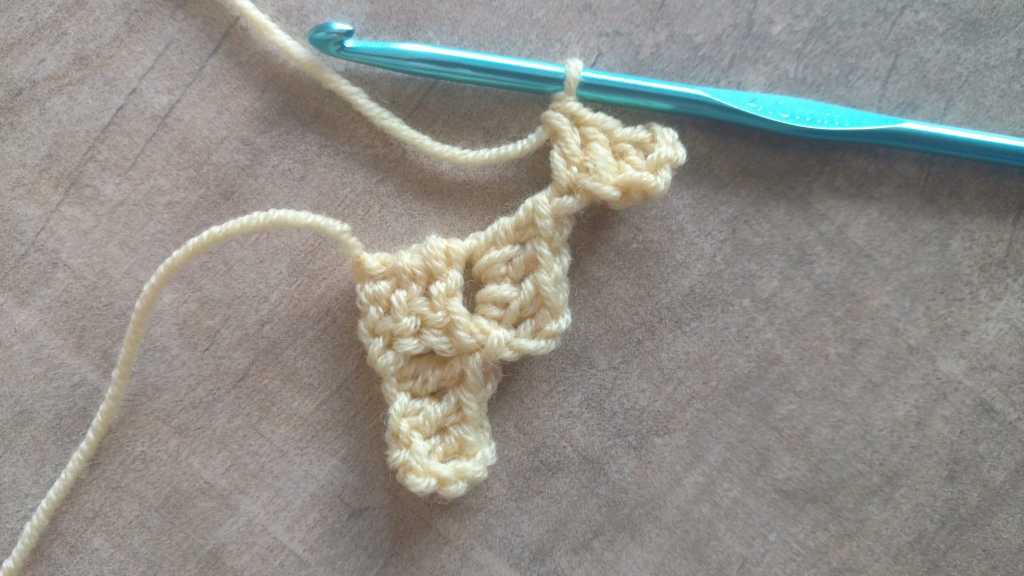
Flip rows 1 and 2 upwards again, so your hook is adjacent to the 3-chain space of the last block of row 2.
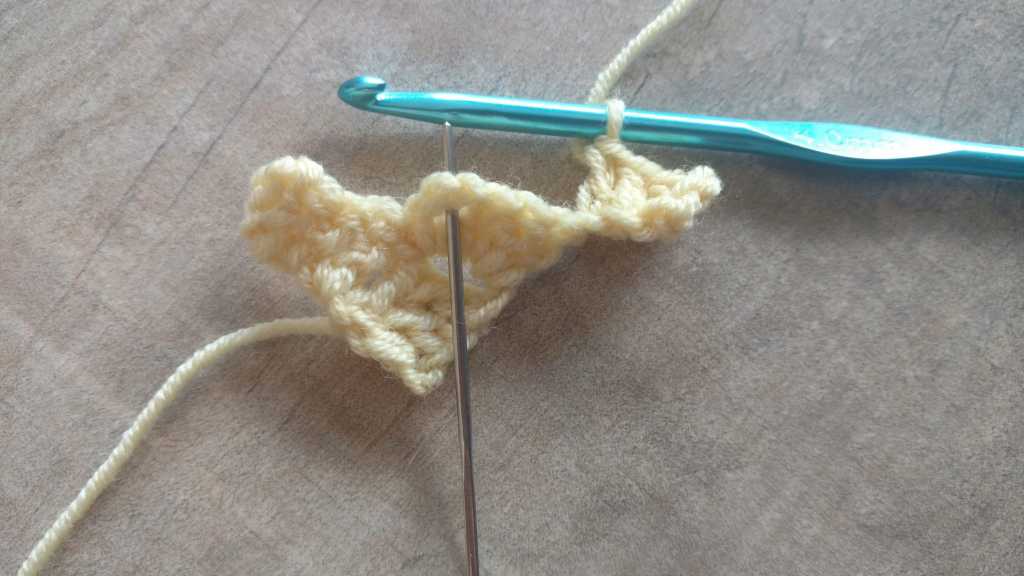
Slip stitch, chain 3.
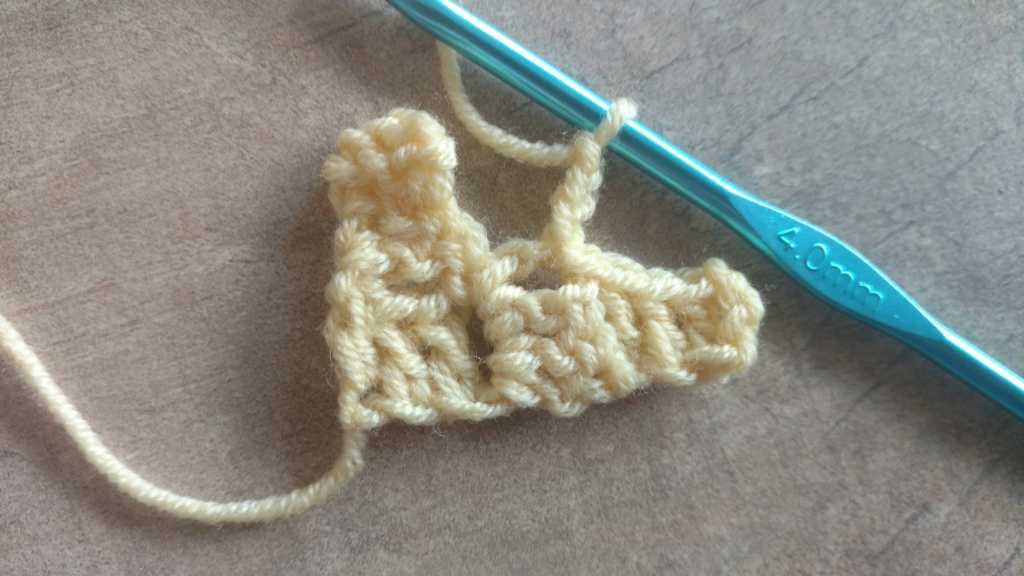
3 double crochet into the same 3 chain space.
Now you automatically ended up next to the 3-chain space of the next block. Slip stitch into it. Chain 3, 3 double crochets into the same 3-chain space.
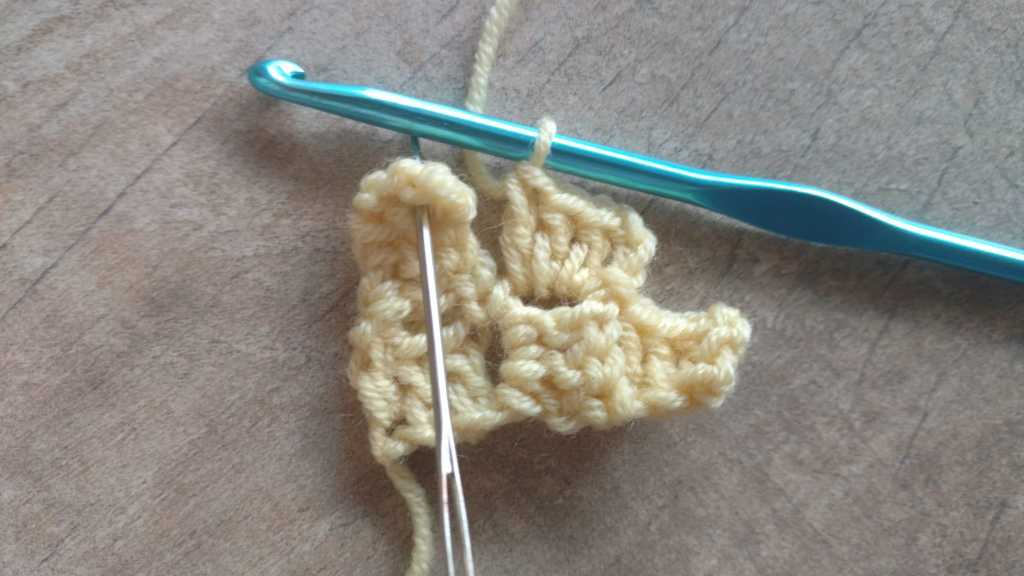
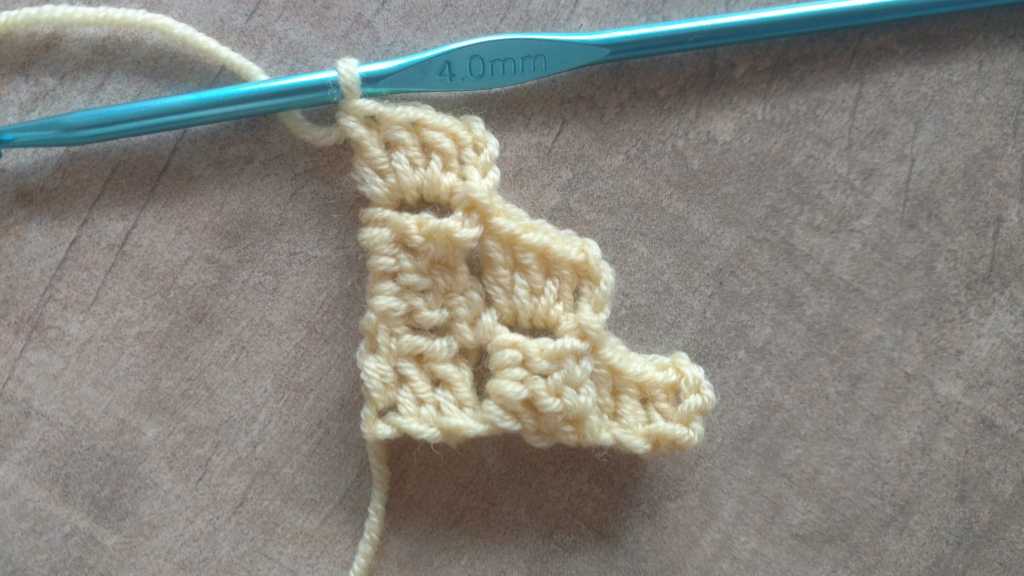
Row 4
Chain 6, double crochet into the 4th, 5th and 6th chain from the hook.
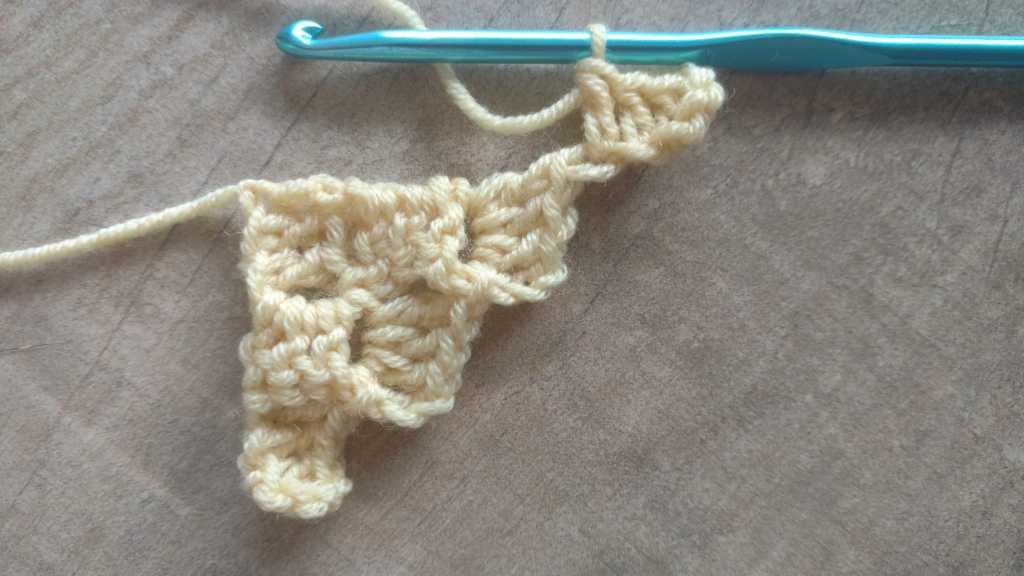
Flip row 1-3 upwards, so your hook is adjacent to the 3-chain space of the last block of row 3. Slip stitch into that space.
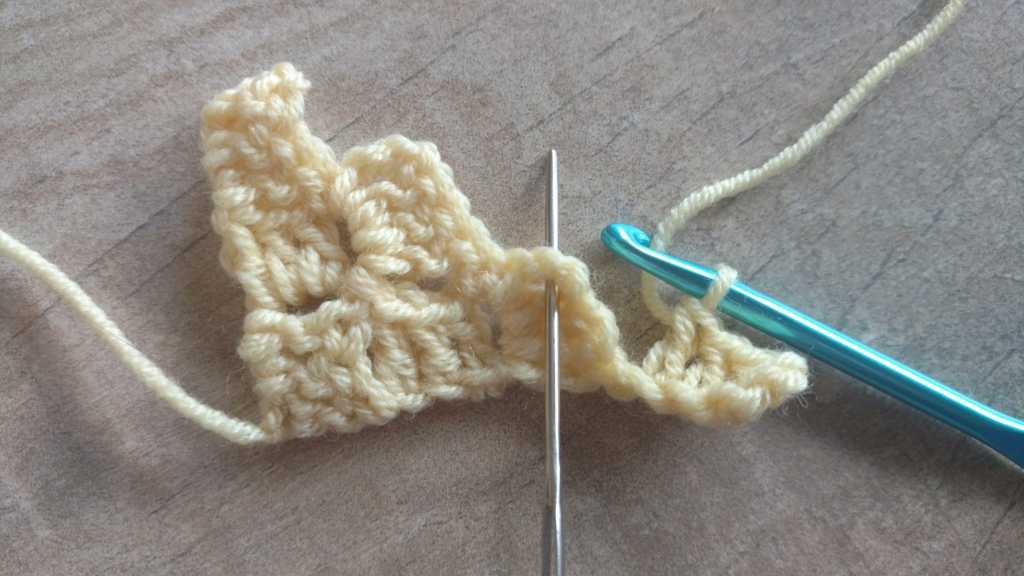
Chain 3, 3 double crochet into the same space. *Slip stitch into the next space, chain 3, 3 double crochet into the next space. Repeat from * once more. Chain 3, 3 double crochet into the same space.
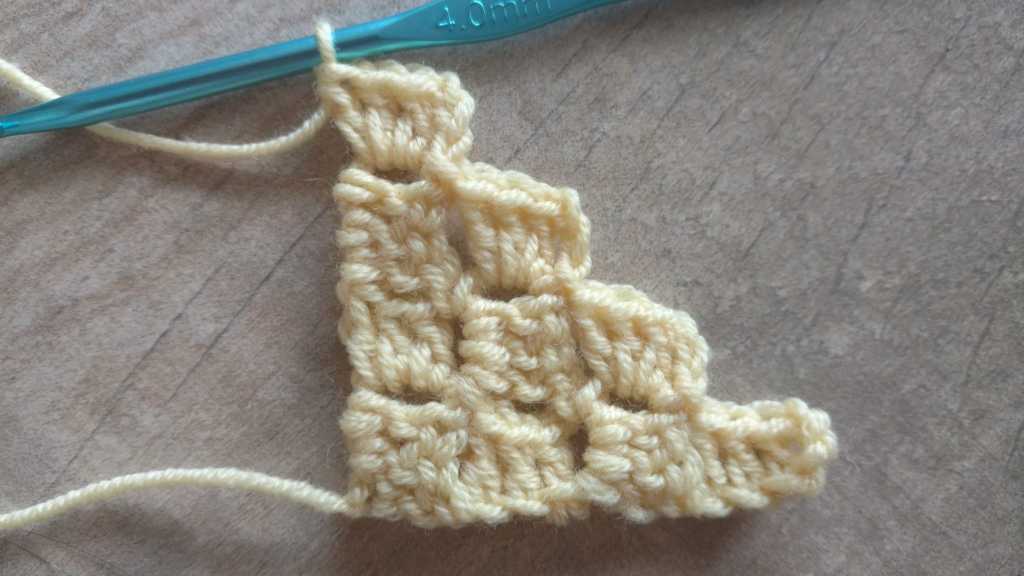
Row 5
Chain 6, double crochet into the 4th, 5th and 6th chain from the hook. Flip row 1-4 upwards, so your hook is next to the 3-chain space of the last block. Slip stitch into that chain space. *Chain 3, 3 double crochet into the same space, slip stitch into the next space* Repeat 3 times, 3 chain, 3 double crochet into the same space. You should have 5 blocks in this row.
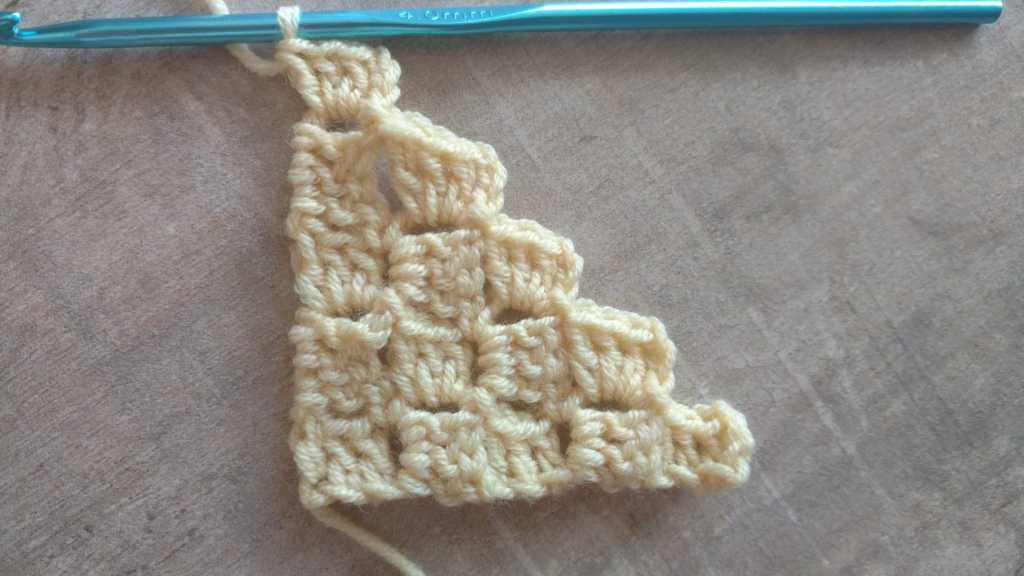
Row 6
Chain 6, double crochet into the 4th, 5th and 6th chain from the hook. Flip row 1-5 upwards, so your hook is next to the 3-chain space of the last block. Slip stitch into that chain space. *Chain 3, 3 double crochet into the same space, slip stitch into the next space* Repeat 4 times, 3 chain, 3 double crochet into the same space. You should have 6 blocks in this row.
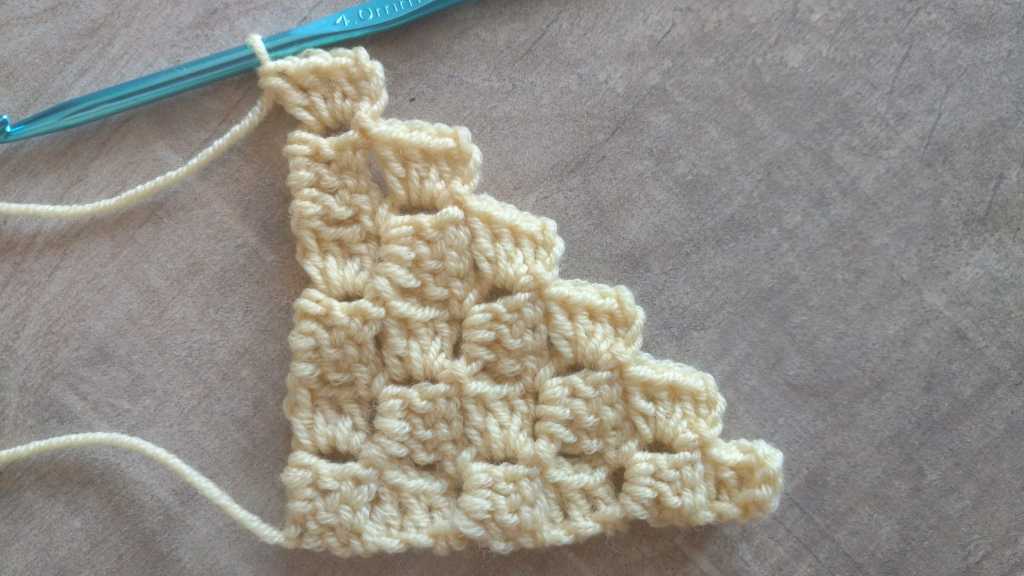
Are you getting used to the pattern by now? Good, because we’re gonna change it up a bit 😉 We’ll start decreasing in the next row. Because the squares are 6 by 6 blocks.
Row 7
Chain 3. Slip stitch into the 3-chain space of the last block you crocheted of row 6. (See the needle? That’s the space where you need to be!)
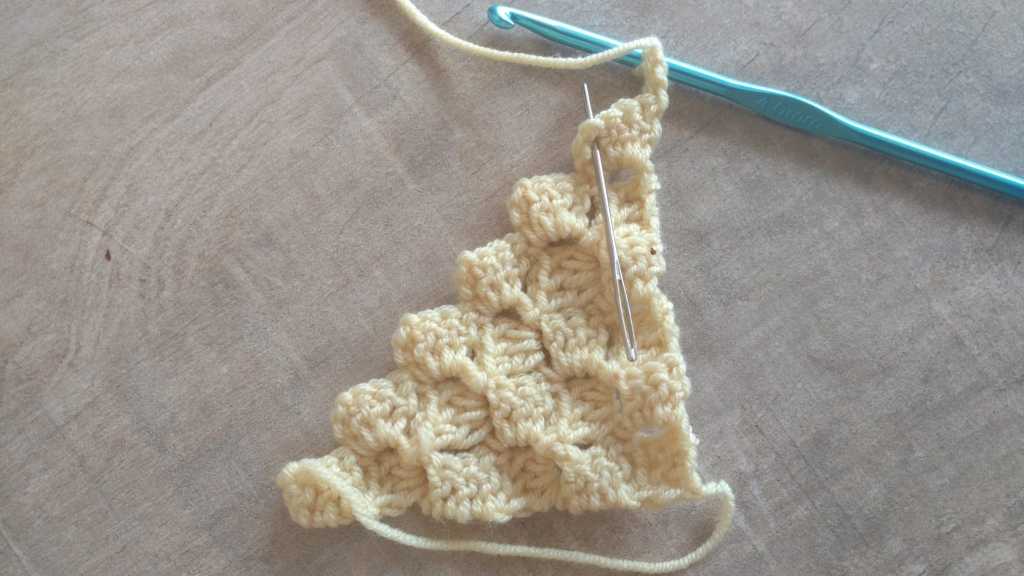
Chain 3.
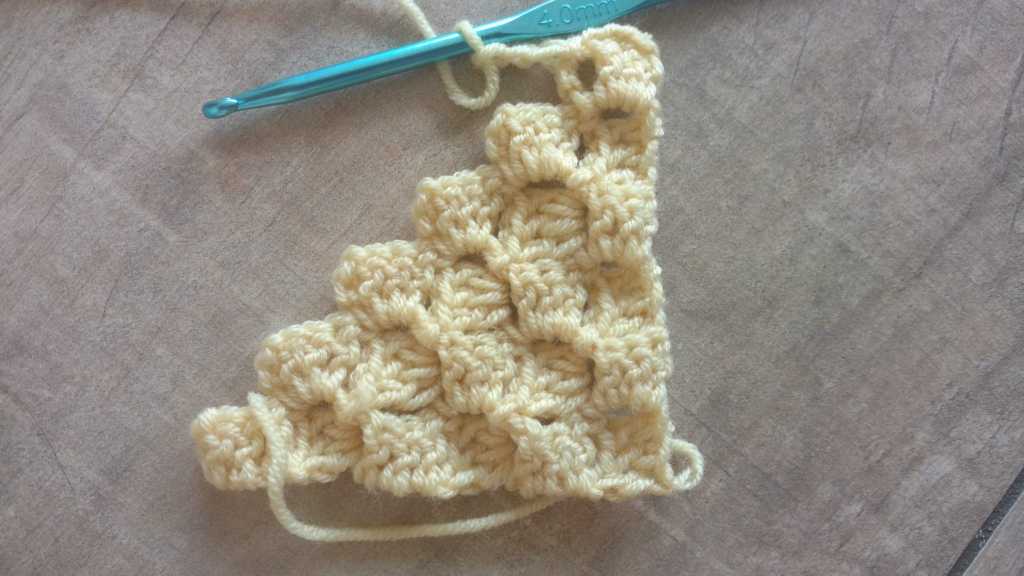
3 double crochet into the same space. (Slip stitch into the next 3-chain space, chain 3, 3 double crochet into the same space) x 4. Slip stitch into the next space. There are 5 blocks in this row.
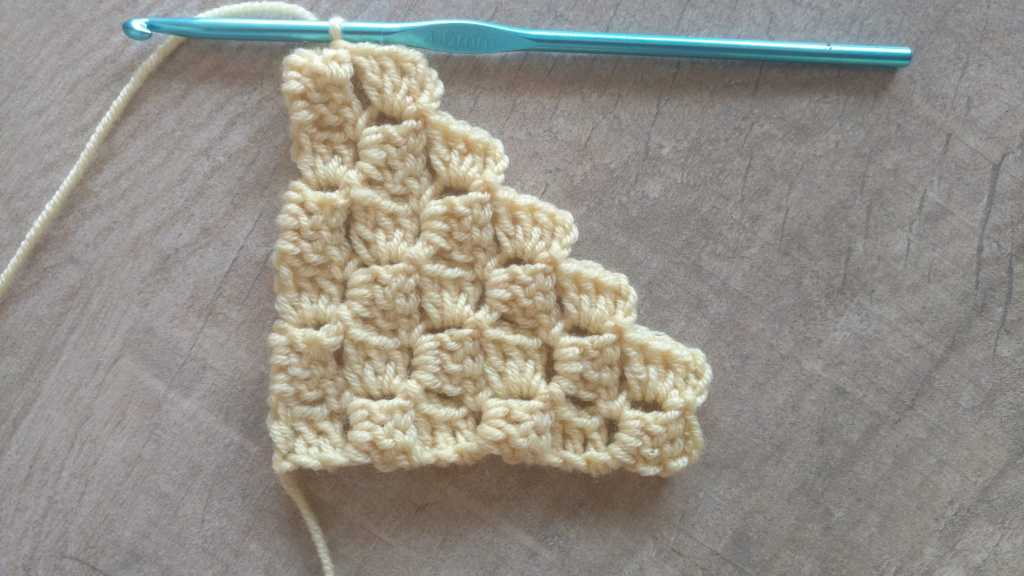
Row 8
Chain 3, turn, slip stitch into the 3-chain space of the last-made block of row 7. Chain 3, 3 double crochet into the same space. (Slip stitch into the next 3-chain space, 3 chain, 3 double crochet into the same space) x 3. Slip stitch into the next space.
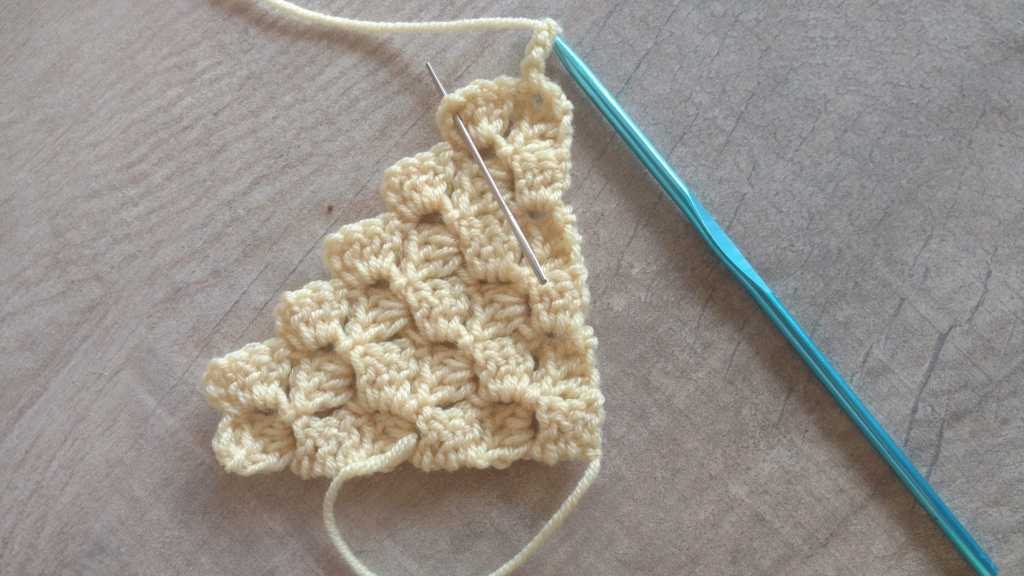
Row 9
Chain 3, turn, slip stitch into the 3-chain space of the last-made block of row 8. Chain 3, 3 double crochet into the same space. (Slip stitch into the next space, chain 3, 3 double crochet in the same space) x 2. Slip stitch into the next space.
Row 10
Almost done with this square! Wiehoe! Chain 3, slip stitch into the space of thelast made block of row 9, chain 3, 3 double crochet into the same space, slip stitch into the next space, 3 chain, 3 double crochet into the same space, slip stitch into the next space.
Row 11
Chain 3, slip stitch into the space of the last made block of row 10. Chain 3, 3 double crochet into the same space. Slip sttich into the next block.
IMPORTANT LAST STEP: chain 3, slip stitch into the outermost corner of the square.
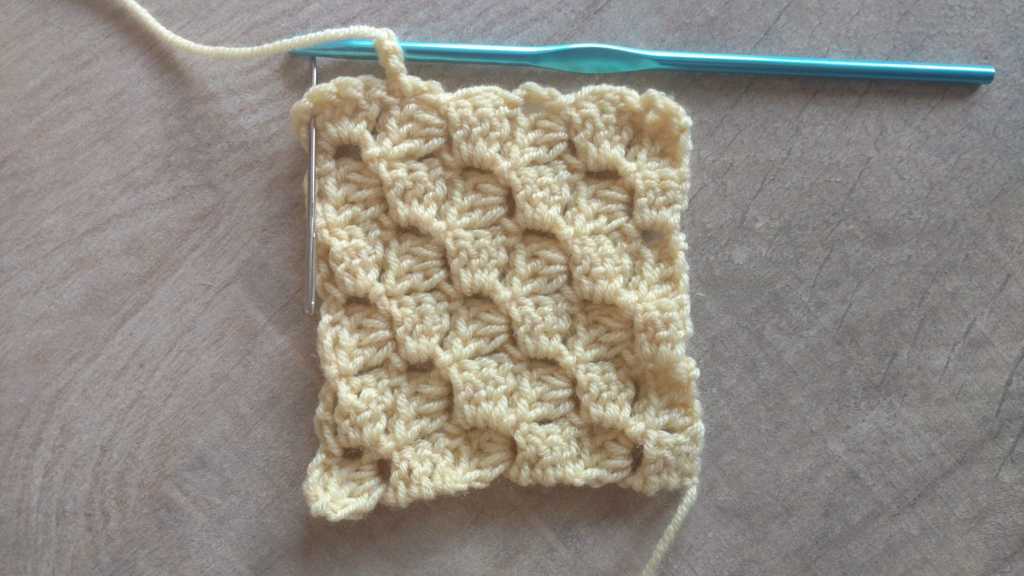
Put the square so that the begin yarn is in the right bottom corner and the end tail is in the left upper corner. Put a stitchmaker through the front of the square. This will be you right bottom most square of the blanket. The longest diagonal line should have vertical double crochet, seen from the wrong side, right? At least check the orientation and direction, it’s important for the next step.
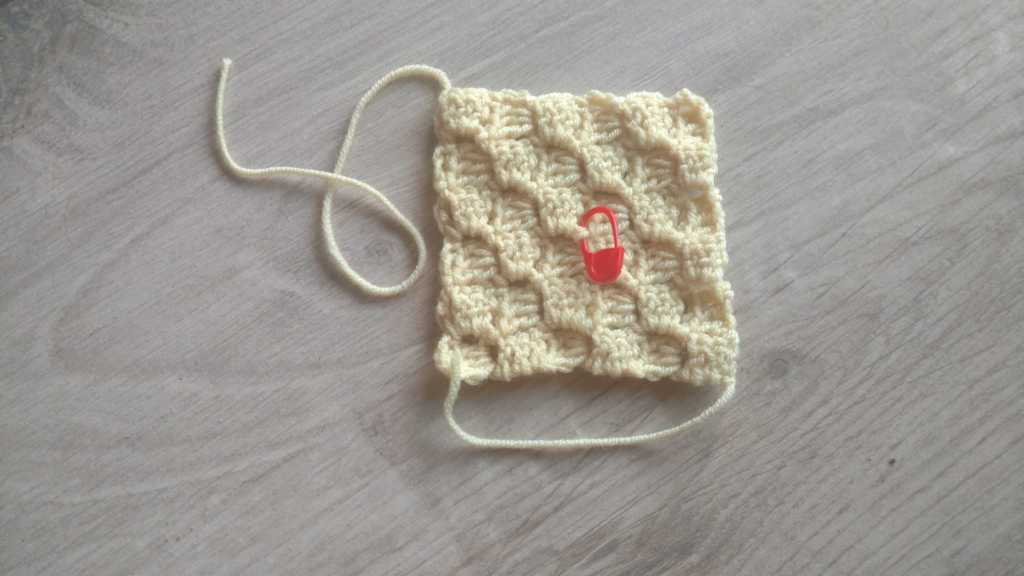
Square 2
You start each and every square in the right bottom corner of that square. For square 2 it means that you start in the corner to the left of the corner of where you ended on square 1. (This is the most confusing bit of the blanket!)
Row 1
Slip stitch your new colour into the 3-chain space in the left bottom corner of square 1. Chain 6. Double crochet into the 4th, 5th and 6th chain from the hook.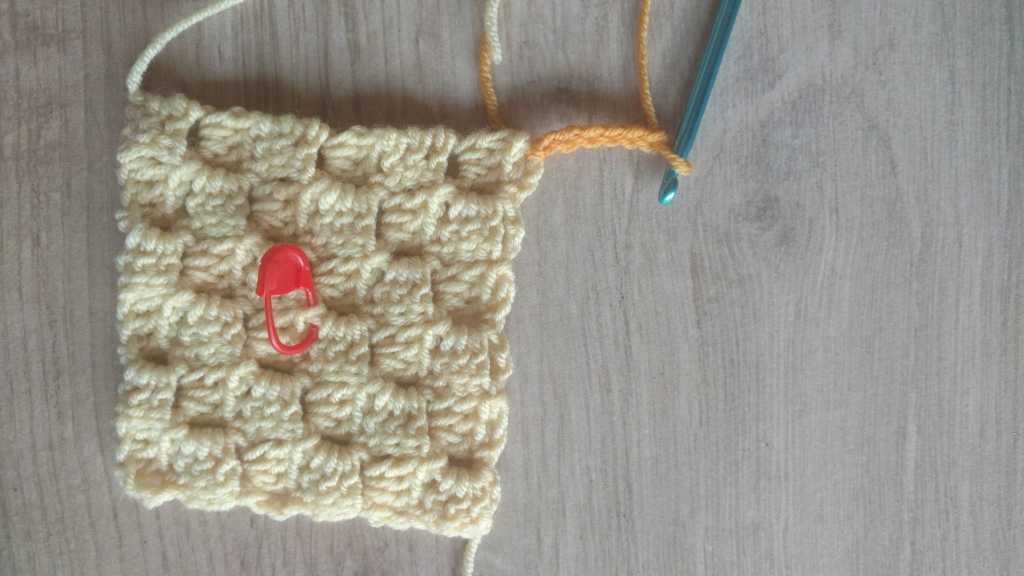
Please have a careful look at the orientation and direction of the blocks now. You want the pattern of horizontal/vertical and right side/wrong side of square 2 to match that of square 1. If the adjacent block on square 1 is vertical and wrong side (see picture), you want your square 2 block to be horizontal and right side.
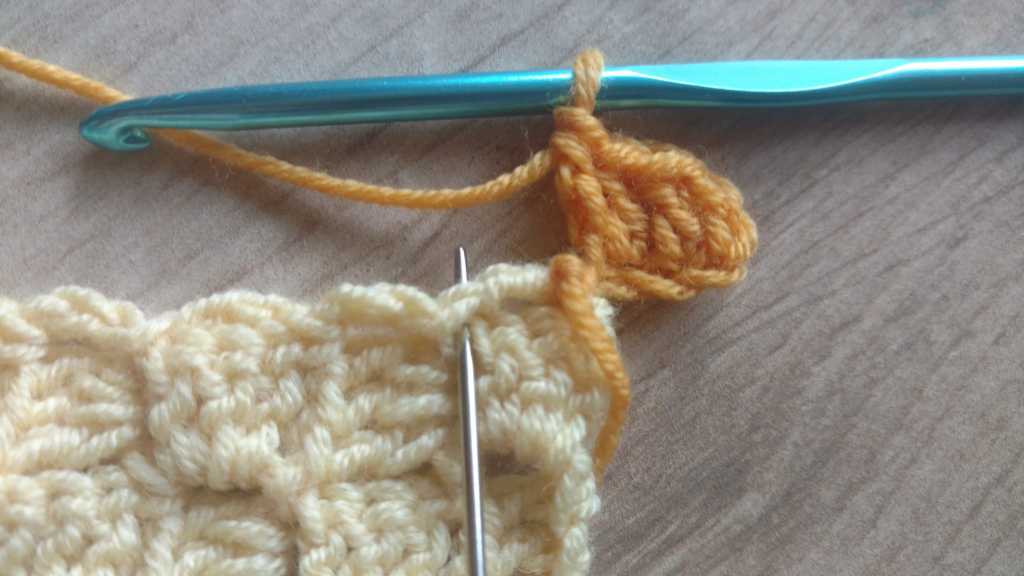
Slip stitch into the slip stitch of square 1 (see needle in picture).
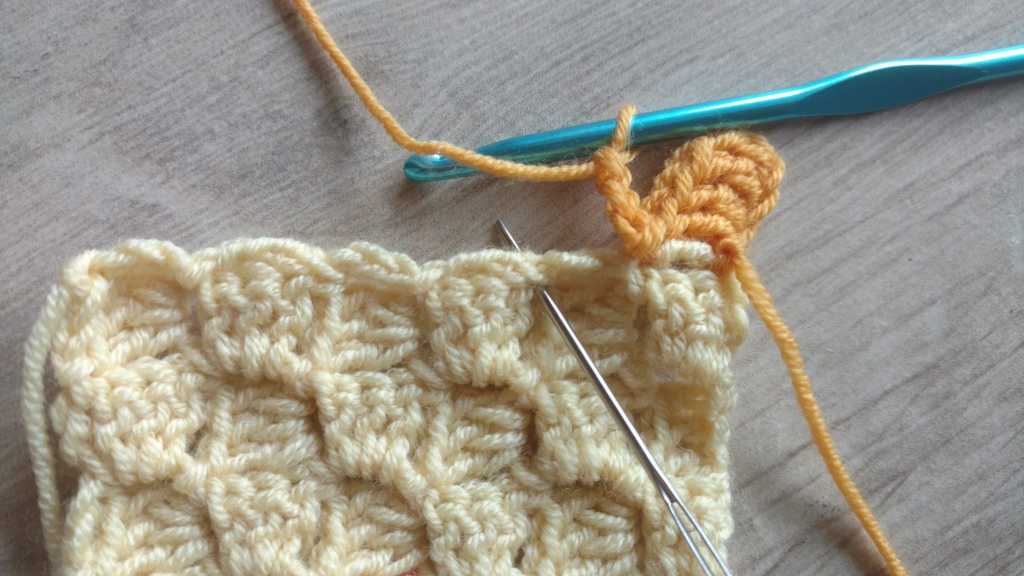
Row 2
Chain 3, slip stitch into next slip stitch of square 1.Chain 3, turn your work. 3 double crochet into the chain-space you just made adjacent to square 1. Slip stitch into next 3 chain space of row 1.
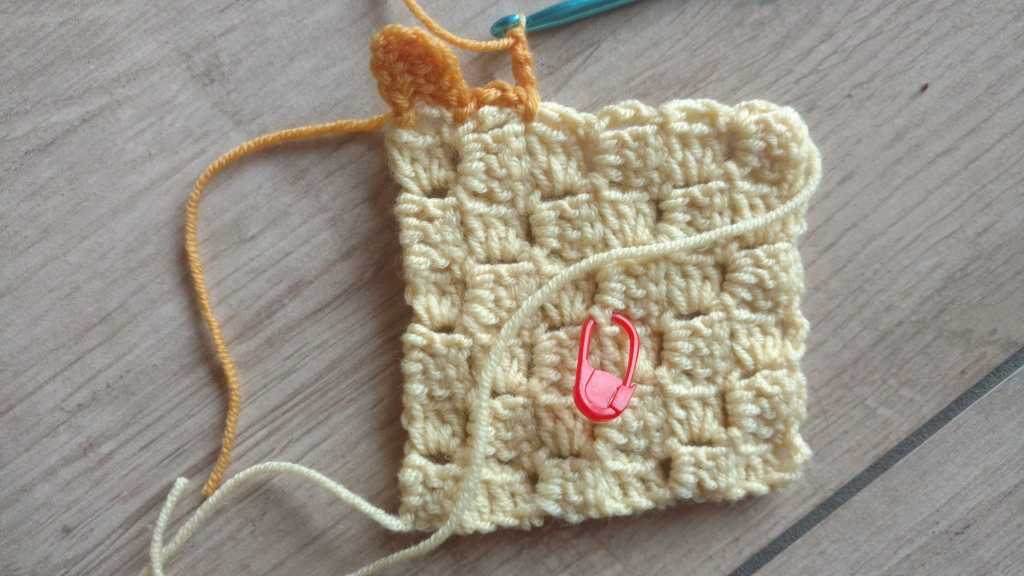
Chain 3, 3 double crochet into the same space.
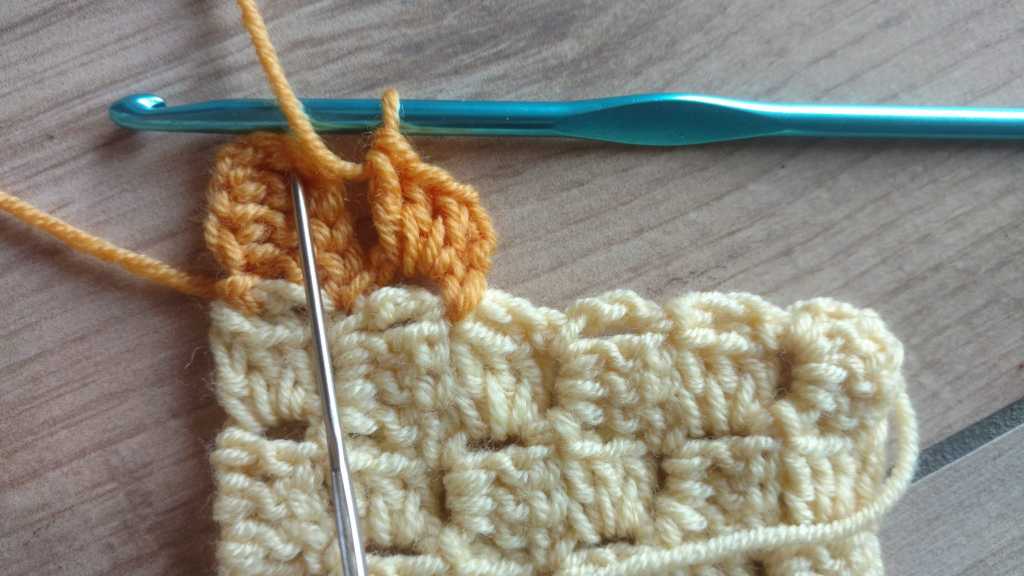
Row 3
Chain 6, double crochet into the 4th, 5th and 6th chain from the hook. Turn your work. (Slip stitch into the next 3-chain space of row 2. Chain 3, 3 double crochet into the same space) x 2. Slip stitch into the next slip stitch on square 1.
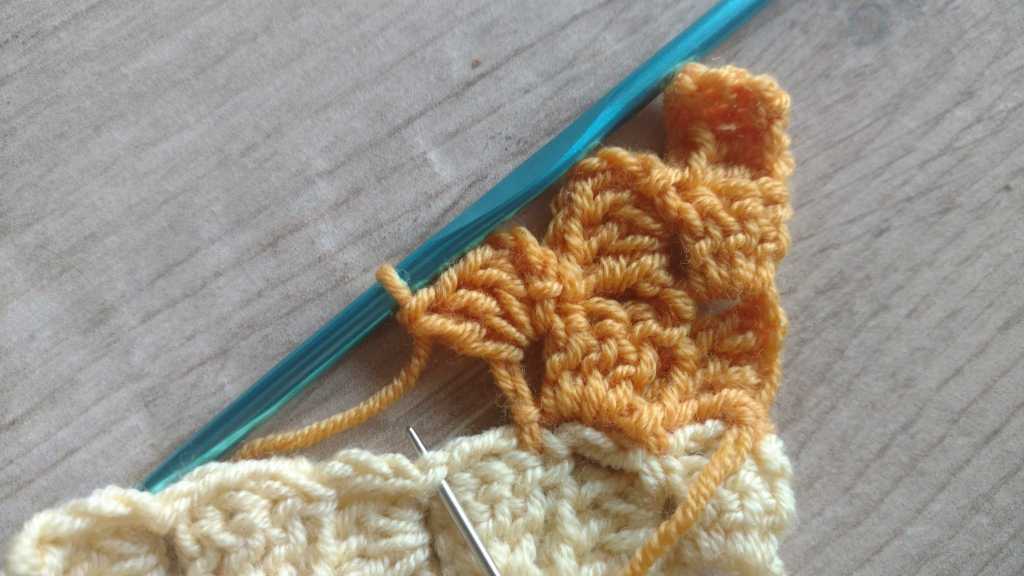
Row 4
Chain 3. Slip stitch into the next slip stitch on the first square.
Chain 3, turn. 3 double crochet in the 3-chain space adjacent to square 1. (Slip stitch into the next 3-chain space, chain 3, 3 double crochet into the next space) x 3, slip stitch into the next slip stitch on square 1.
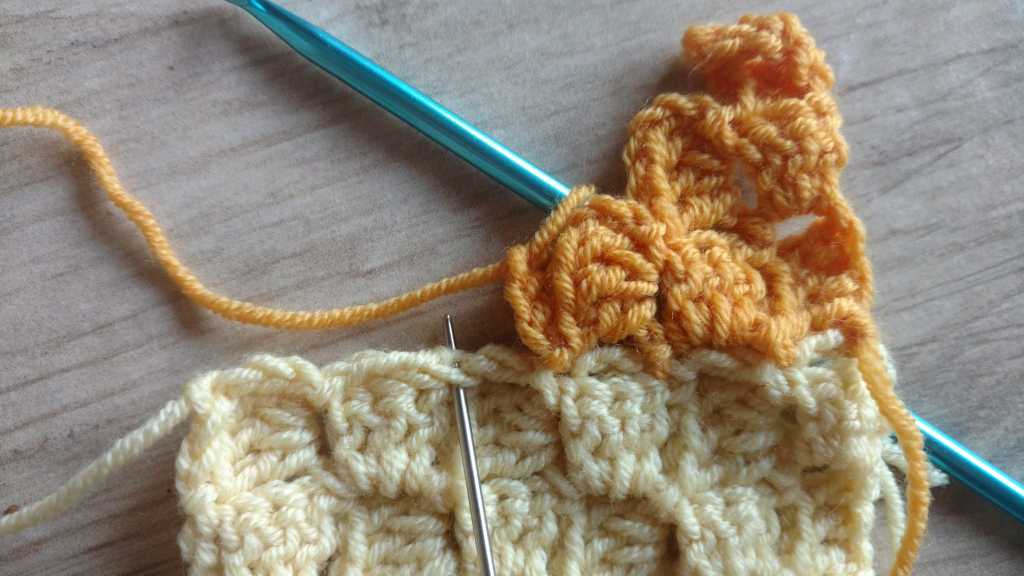
Row 5
Chain 6, double crochet into the 4th, 5th and 6th chain from the hook. Flip your work. (Slip stitch into the next chain space. Chain 3, 3 double crochet into the same space.) x 4. Slip stitch into the next slip stitch on square 1.
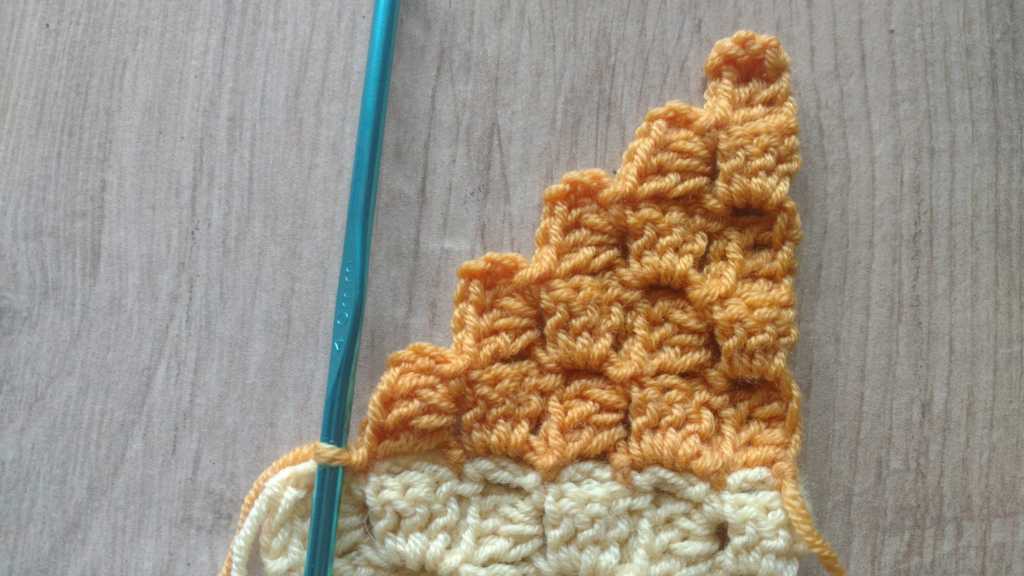
Row 6
Chain 3, slip stitch into the last slip stitch of square 1. Chain 3, turn around. 3 double crochet into the 3-chain space. (Slip stitch into next space, chain 3, 3 double crochet into the same space) x 5.
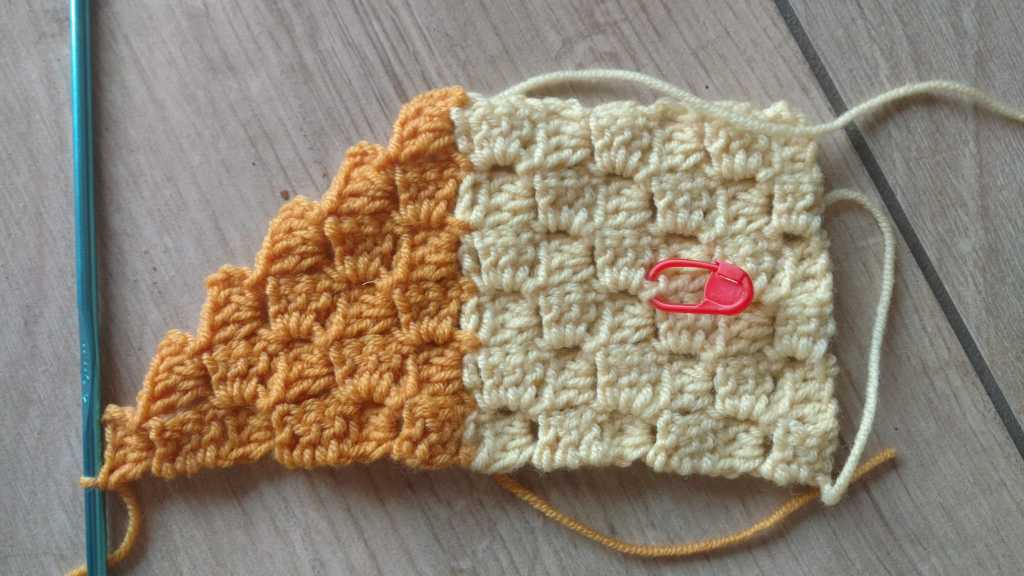
Row 7-11
Finish the square like you did for square 1.
Darn in the ends.
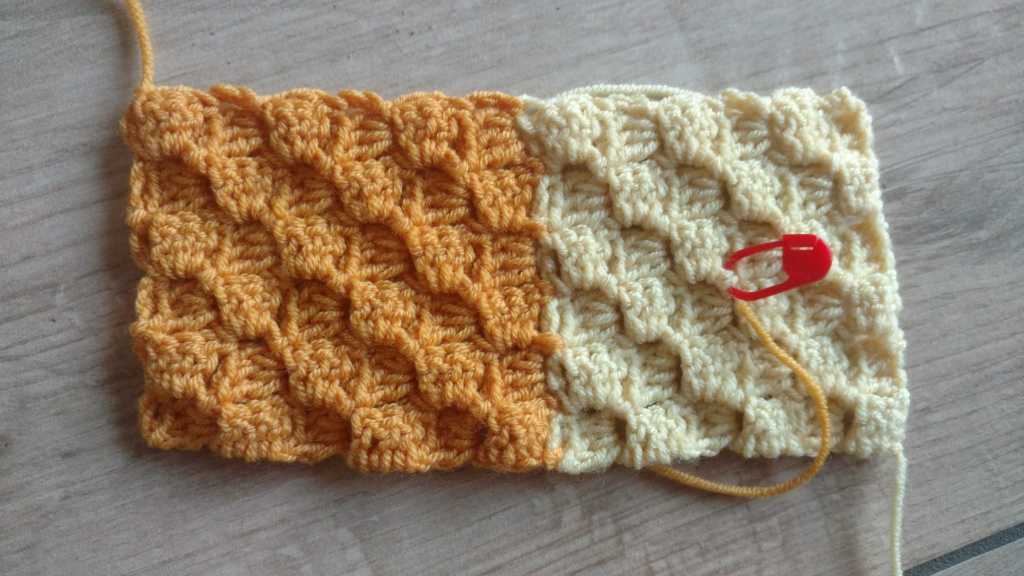
Square 3-….
Now you can continue attaching squares in the same direction, until you’ve reached the desired with of the blanket. When you’re done, you’ll start the second strip of squares, on top of the first.
Second strip of squares
For the second strip (and each consecutive), you’ll start in the right bottom corner of the new square. For the first square of the second strip, this is the right top corner of the very first square you made (to be recognized by the stitch marker). Please pay close attention to the direction and orientation of the square.
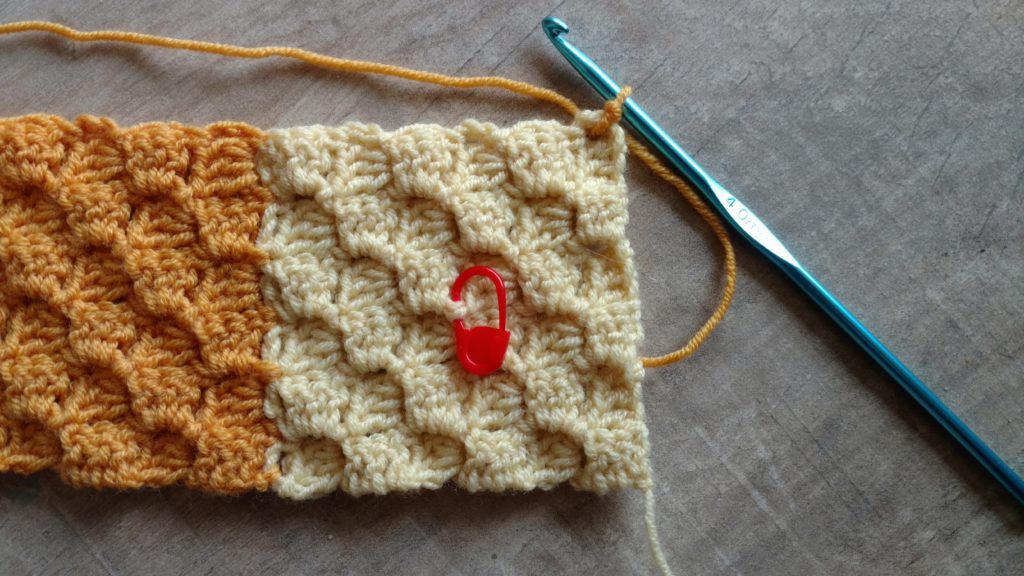
Slip stitch into the outermost corner, chain 3.
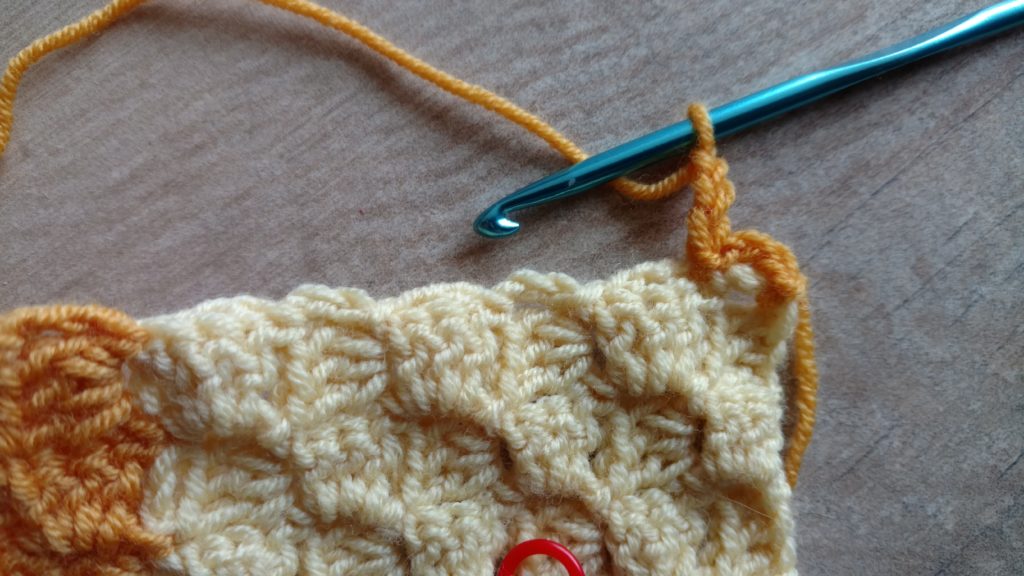
Slip stitch into the other side of the same block. Chain 3. Turn your work. 3 double crochet into the chain space you just made adjacent to square 1.
Check the direction and orientation!
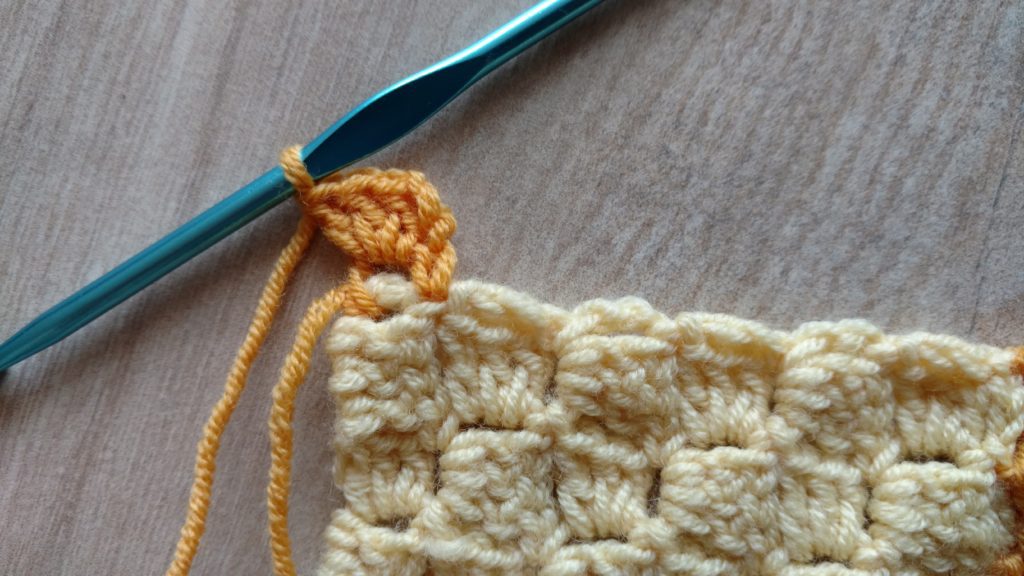
You should be able to make this square by now. Please make sure that you make the last attaching slip stitch of this square into square 1 and not accidently in square 2. Please remember also to finish each square in its corner (so make those last 3 chain and slip stitch into the corner).
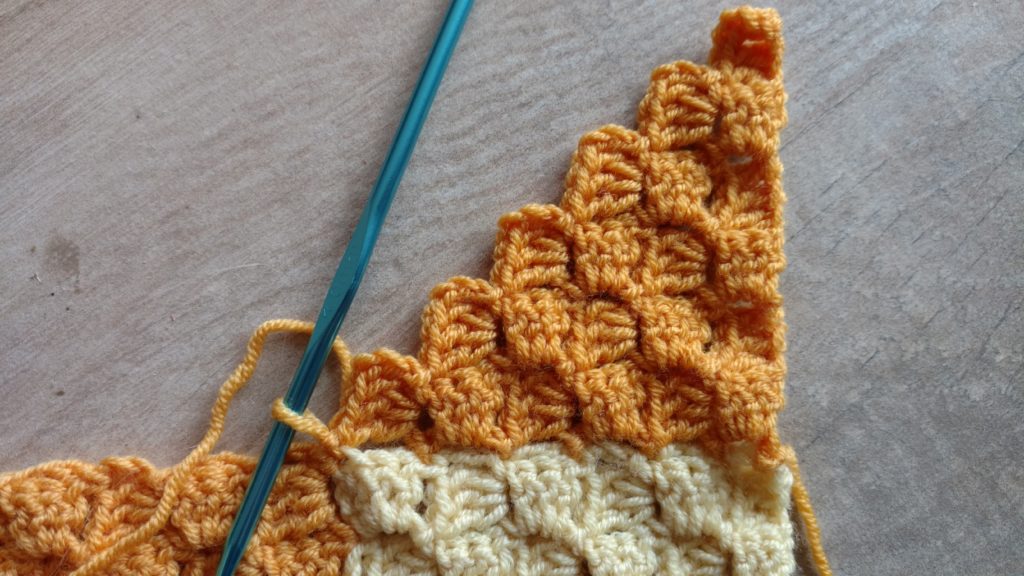
Finish the square.
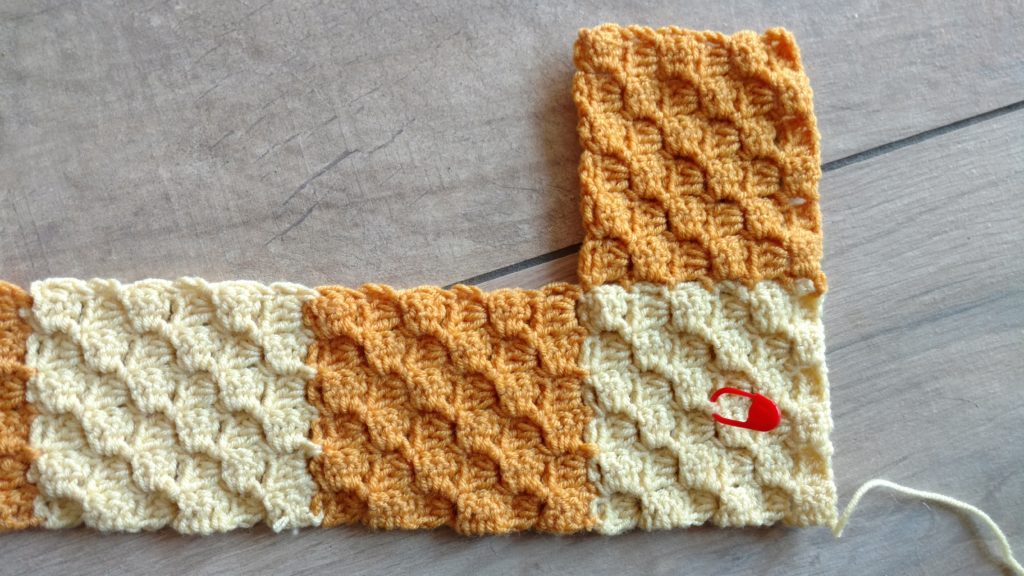
Enjoy your view!! It’s so beautiful!
Now you will learn how the last “variant” of the squares work.
Attach your new colour into the corner second square of the first strip.
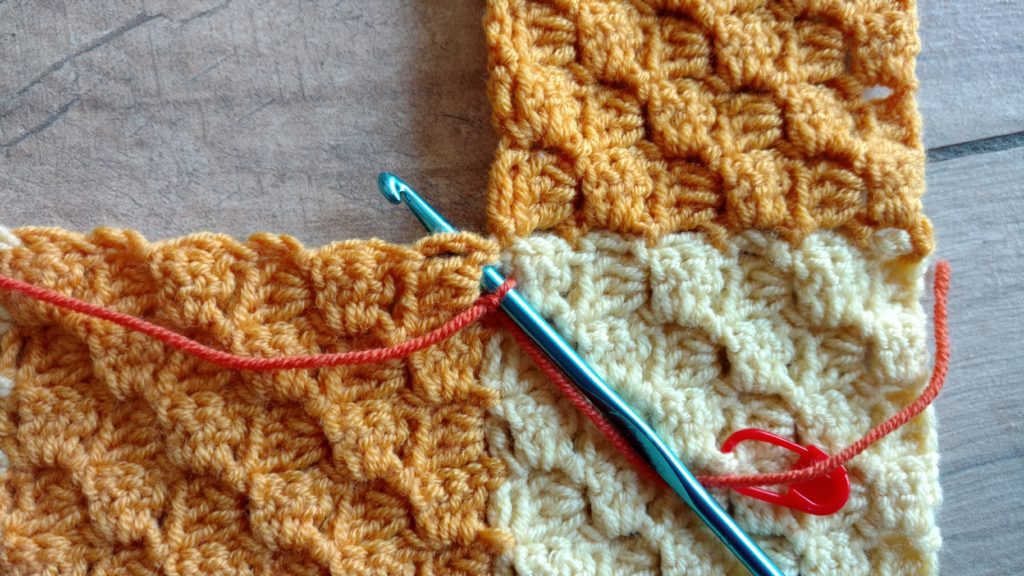
Chain 3, slip stitch into the other side of the same block of square 2 of strip 1. Turn your work. Chain 3, 3 double crochet into the 3-chain space you just made.
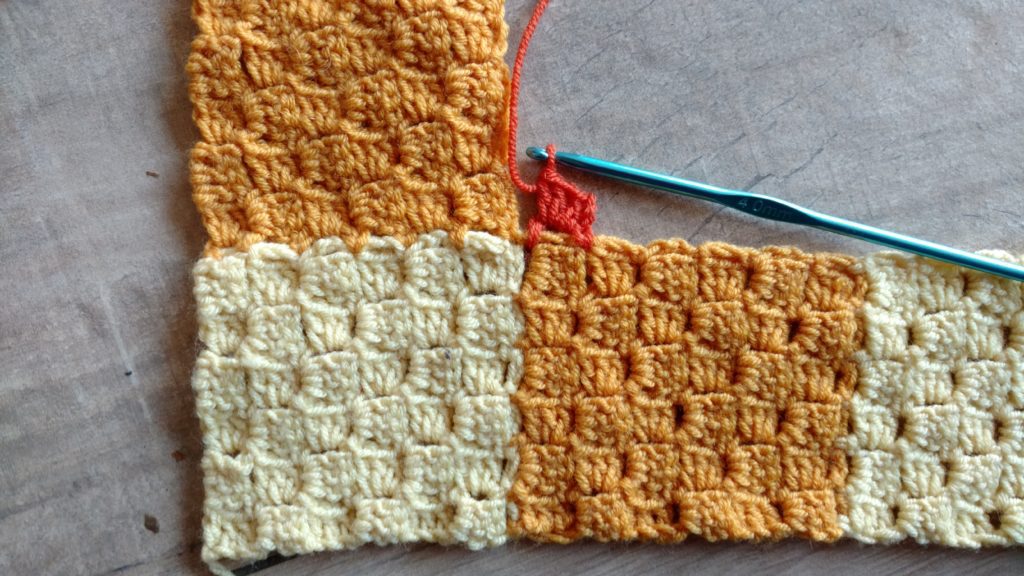
With the risk of sounding like a broken record: check the orientation and direction of the new block here to make sure it’s placed correct 😊
Slip sttich into the slip stitch of the top square, chain 3, slip stitch into the next slip stitch of the top square, chain 3.
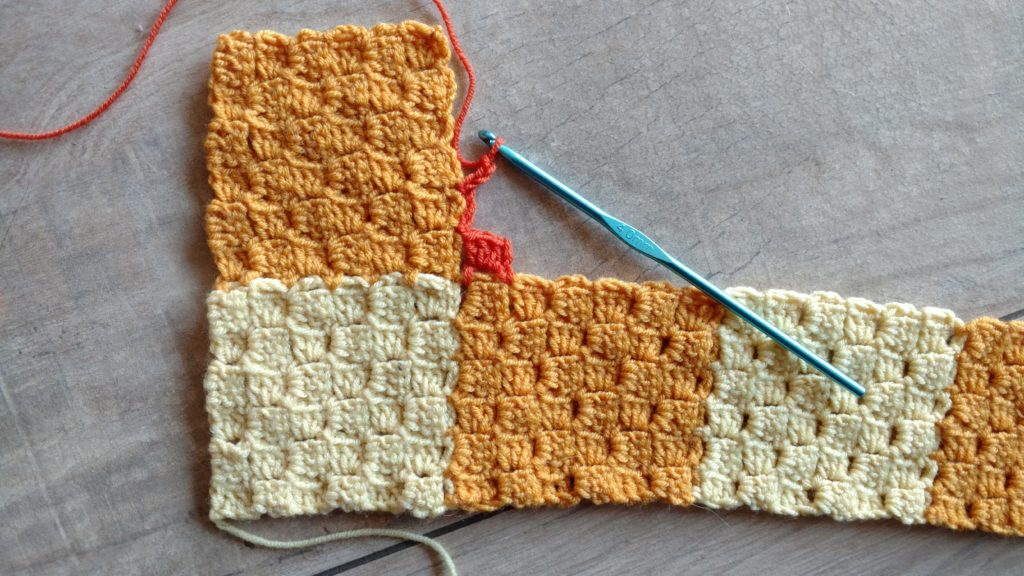
Turn your work, 3 double crochet into the chain space you just made. Slip stitch into the first block of this new square, chain 3, 3 double crochet into the same space. Slip stitch into the next block of the bottom square.
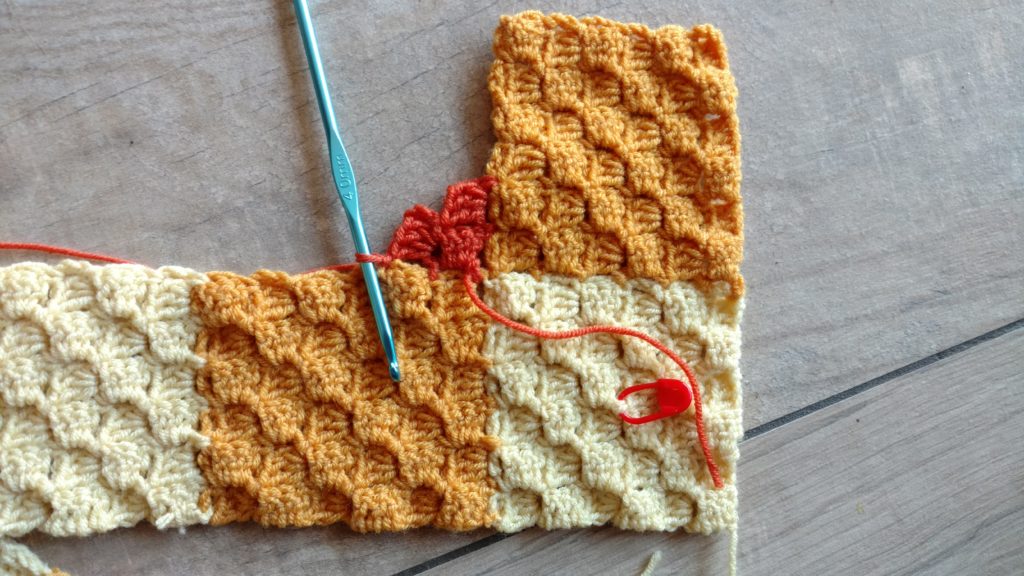
Carry on! You’ve got all the tools now to make a wonderful gingham corner to corner blanket. I hope you enjoy it!
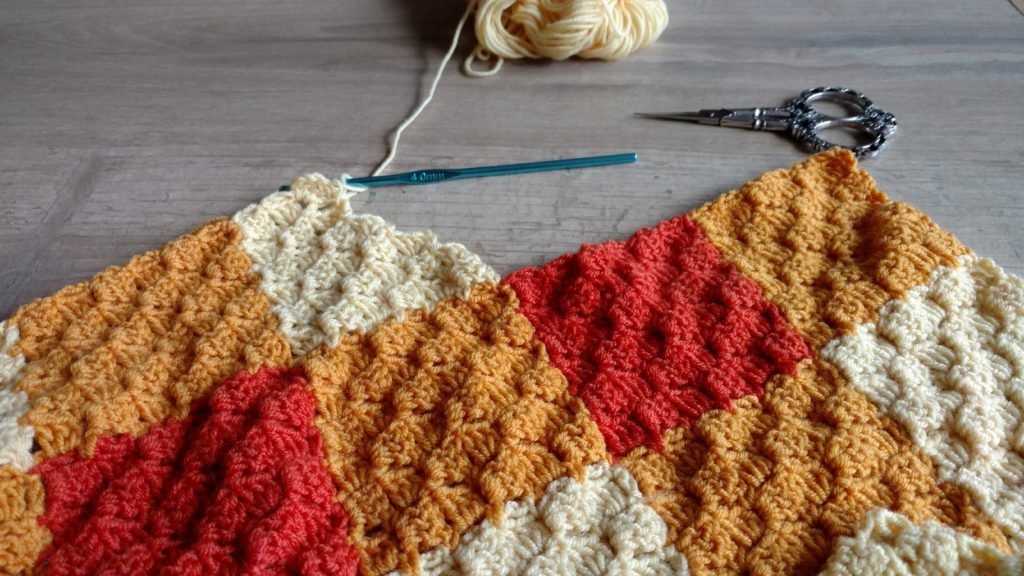
Did you enjoy this pattern? Do you have a question? Please reach me on Instagram @eenmooigebaar or on Facebook.com/eenmooigebaar

Thank you!
English Crochet Patterns



Creatieve, enthousiaste en lieve Iris van Meer is het gezicht achter Een Mooi Gebaar en vertaalt, ontwerpt en deelt meer dan duizend haakpatronen met jullie op dit stukje internet.
Mijn verhaal, over hoe ik van onhandige knutselaar toch nog creatieve ondernemer ben geworden, lees je hier: Mijn Verhaal
Als je contact met Iris wil opnemen, ga je naar de contactpagina
