
Scheepjes Crochet in my DNA MAL Week 4 -English US
We've had so much fun, making this project ! The amount of colour choices and options has been great to watch unfold online. This week we'll finish the project with a border and an optional hanging system.
📋 Patroon Kenmerken
Scheepjes Crochet in my DNA MAL Week 4 - Left-handed
Scheepjes Crochet in my DNA MAL Week 4 - Right-handed
The Border
Crochet with crochet hook size 3 mm and color black 301.
We crochet 4 rounds for the border, with an optional extra piece of round for hanging (in two
variations). The first and third round of the border you crochet slip stitches and chain stitches, in the
second and fourth round of the border you crochet double crochets. We have chosen a border of two
"double crochets" high, so that it nicely matches the height of all the strips in the project. This gives a
nice "frame" around your crochet work!
Round 1: Chain stitch round
The start of the border is just before the top right corner (top left if you are left-handed). Do you see the darning needle? That is where you start. We make the attachment there, so that you can work
your threads "invisibly" away. If you also want to create a hanging system, attach it again at a different
point later.
Make a slip knot with black and pull up a loop between two black blocks.
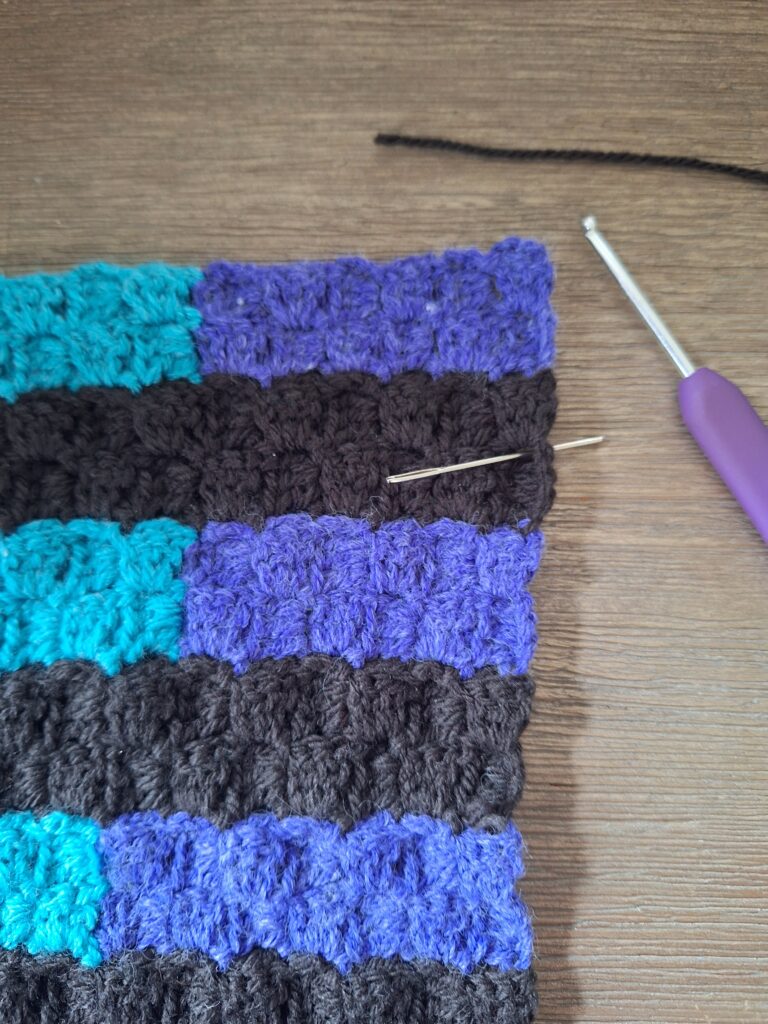
Chain 3, slip stitch between the next 2 blocks.
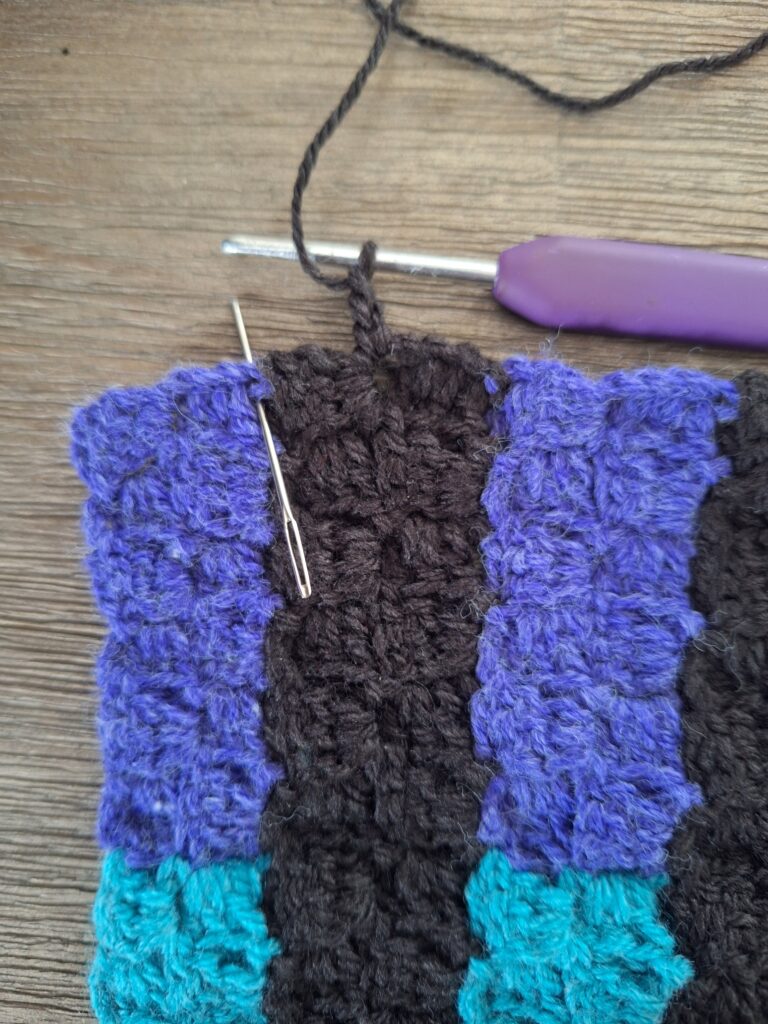
Chain 3, slip stitch in between the next 2 blocks (see needle in the picture).
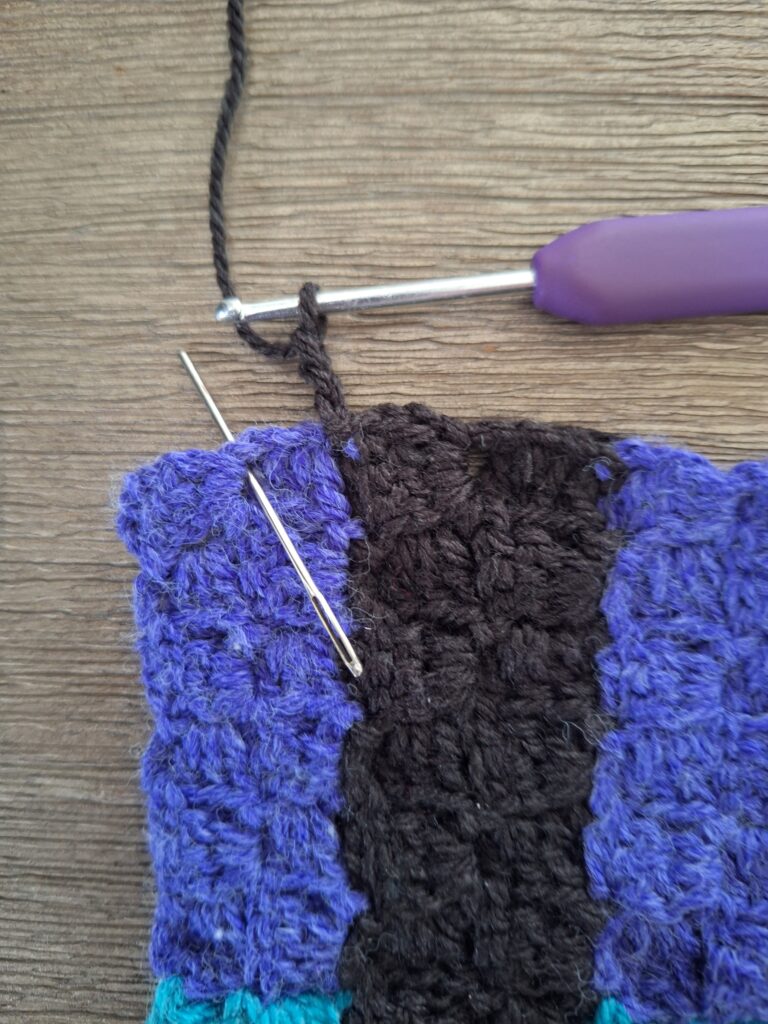
Chain 3, slip stitch into the corner stitch (see needle).
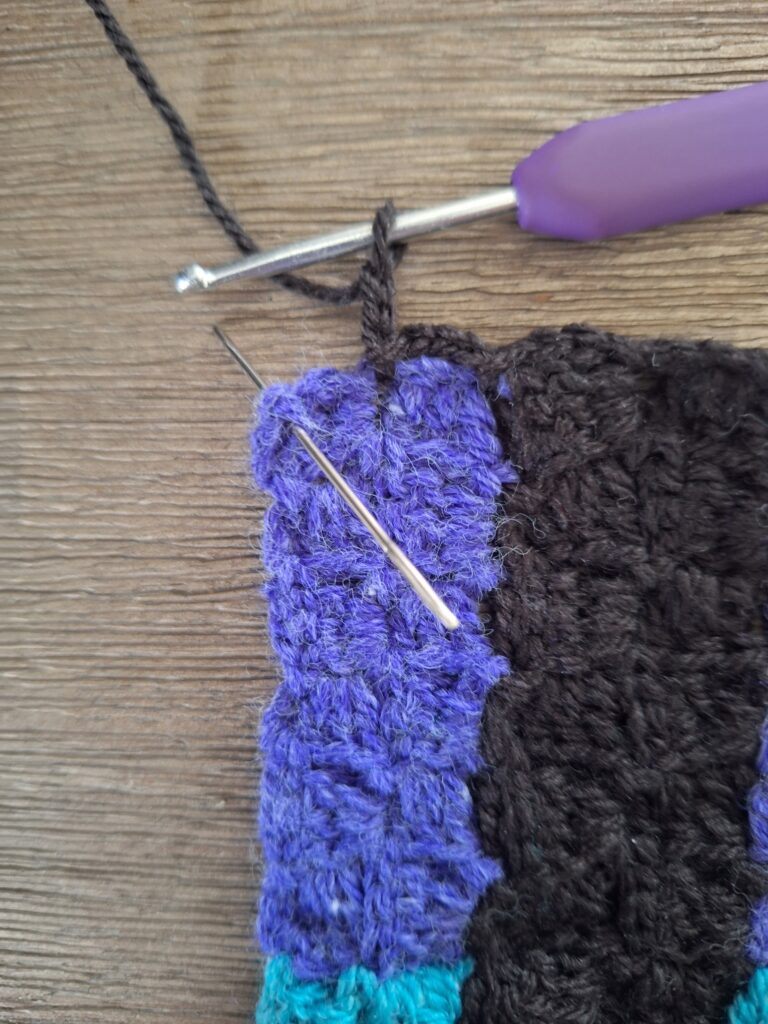
Chain 3, slip stitch into the same corner (see needle)
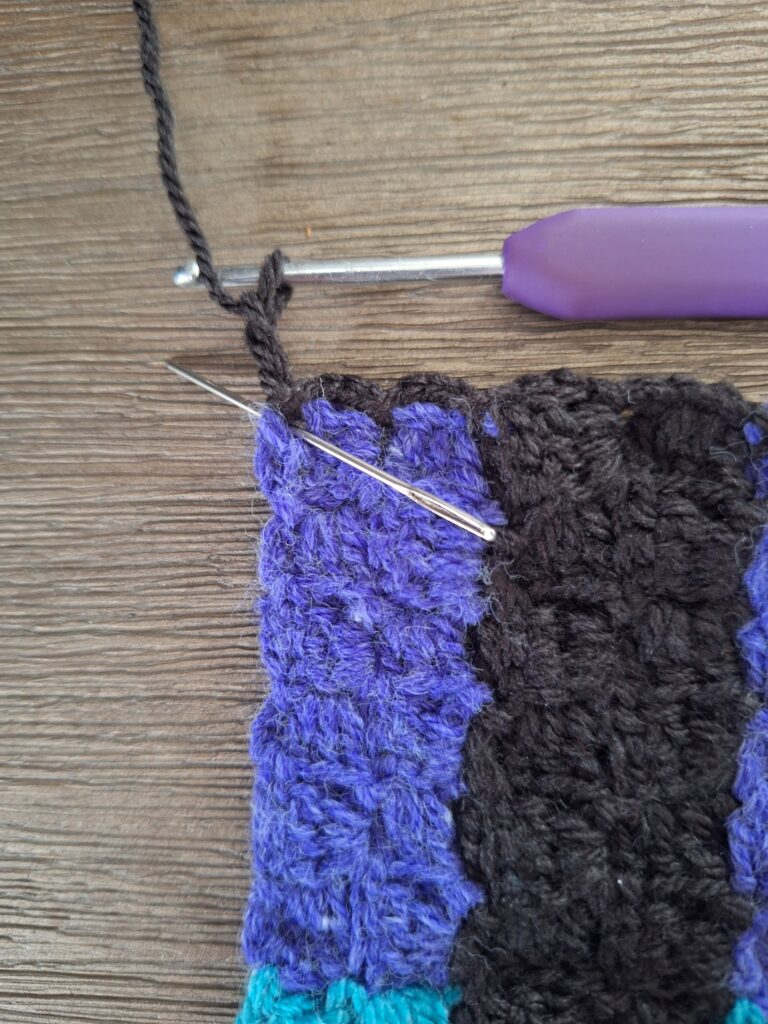
Chain 3, slip stitch into the next slip stitch between two blocks (see needle).
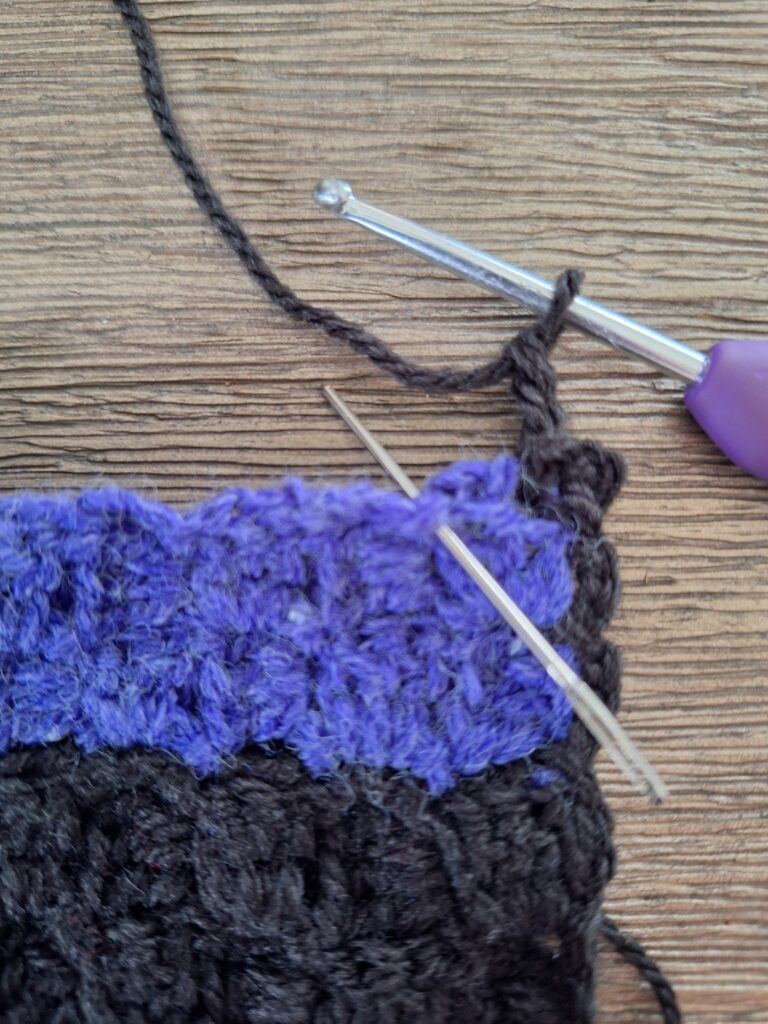
Continue around: chain 3, slip stitch into slip stitch between next 2 blocks, or slip stitch in between next two blocks. In the corner you do (slip stitch, chain 3, slip stitch).
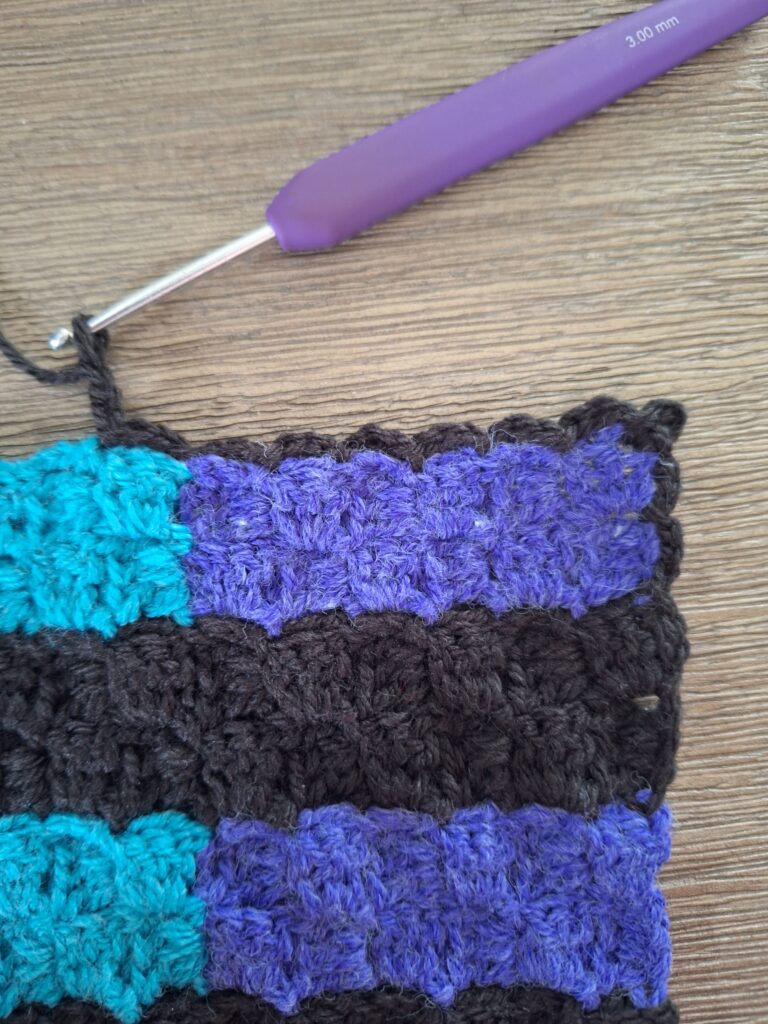
After the last 3 chain, slip stitch into the first chain 3 space of this round (see needle).
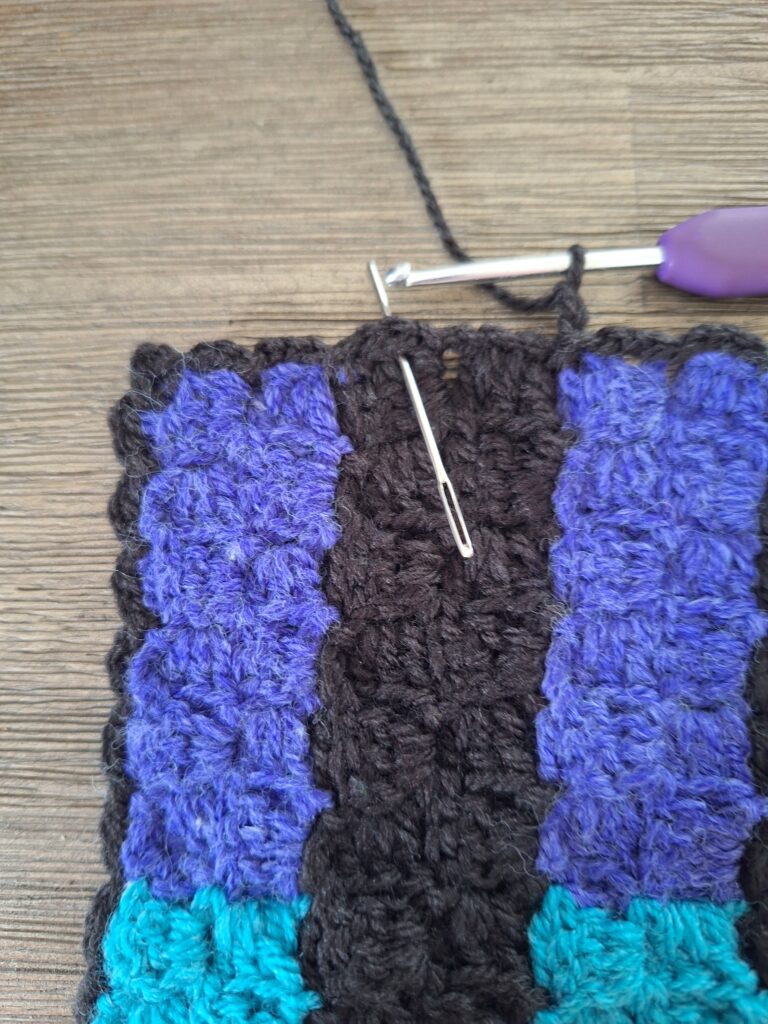
Round 2:
Chain 3, 2 double crochet in the chain space (see needle).
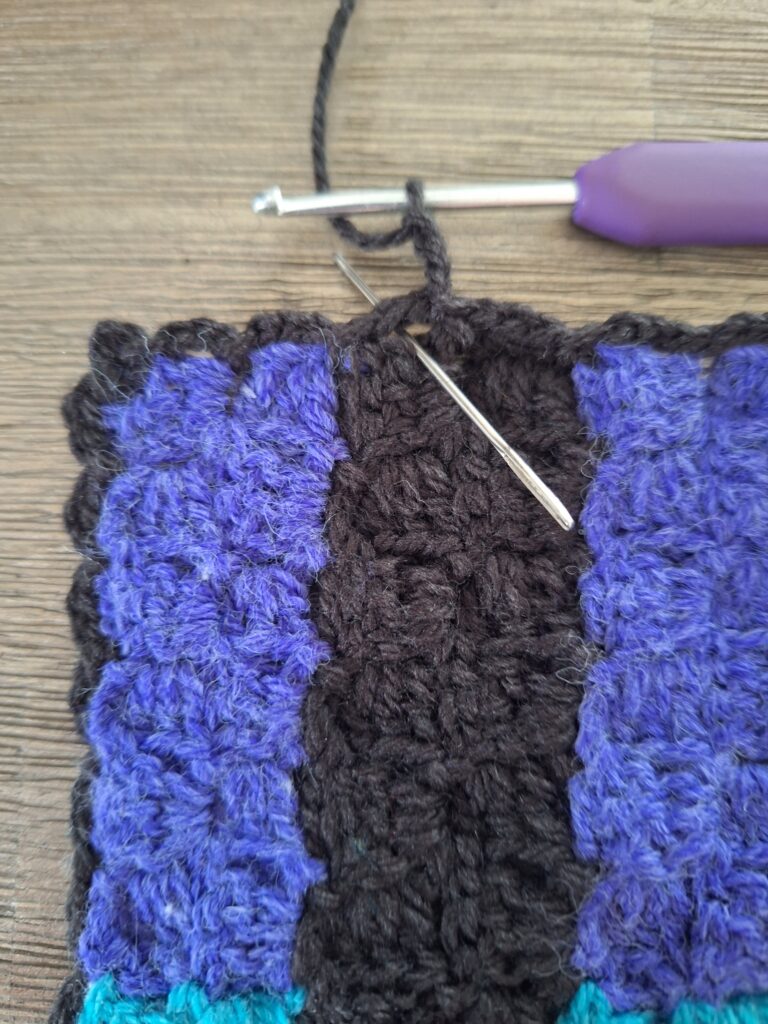
3 double crochet into the next chain space (see needle)
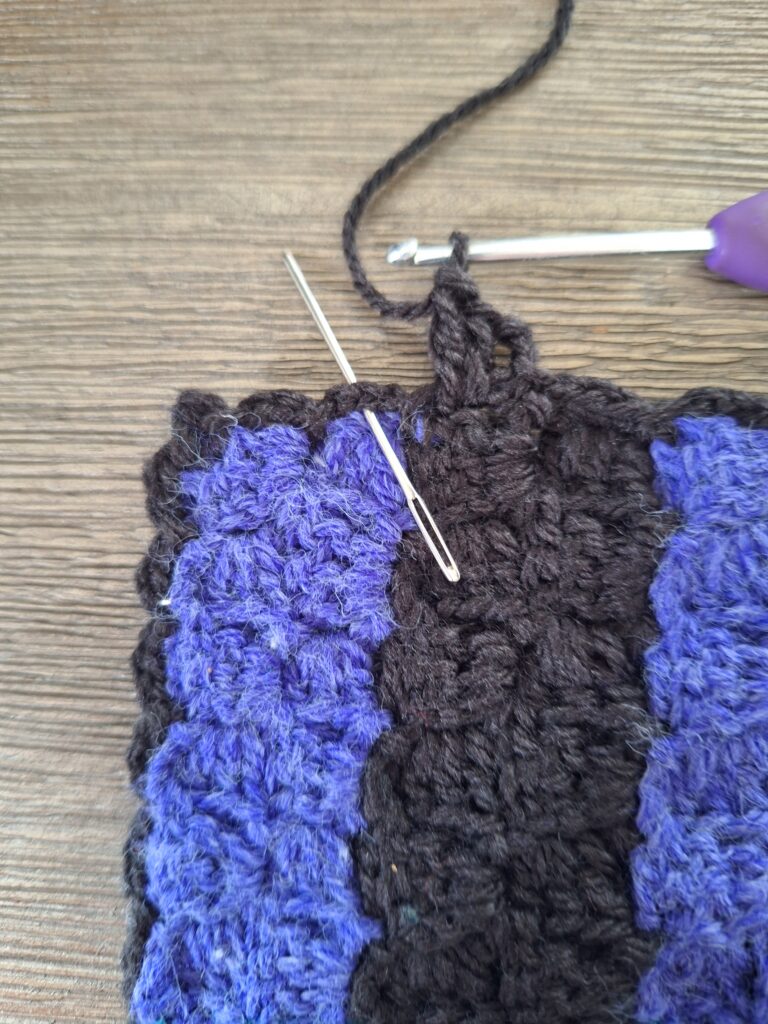
Make 3 double crochet into each chain space. In the small corner space you make (3 double crochet, chain 1, 3 double crochet).
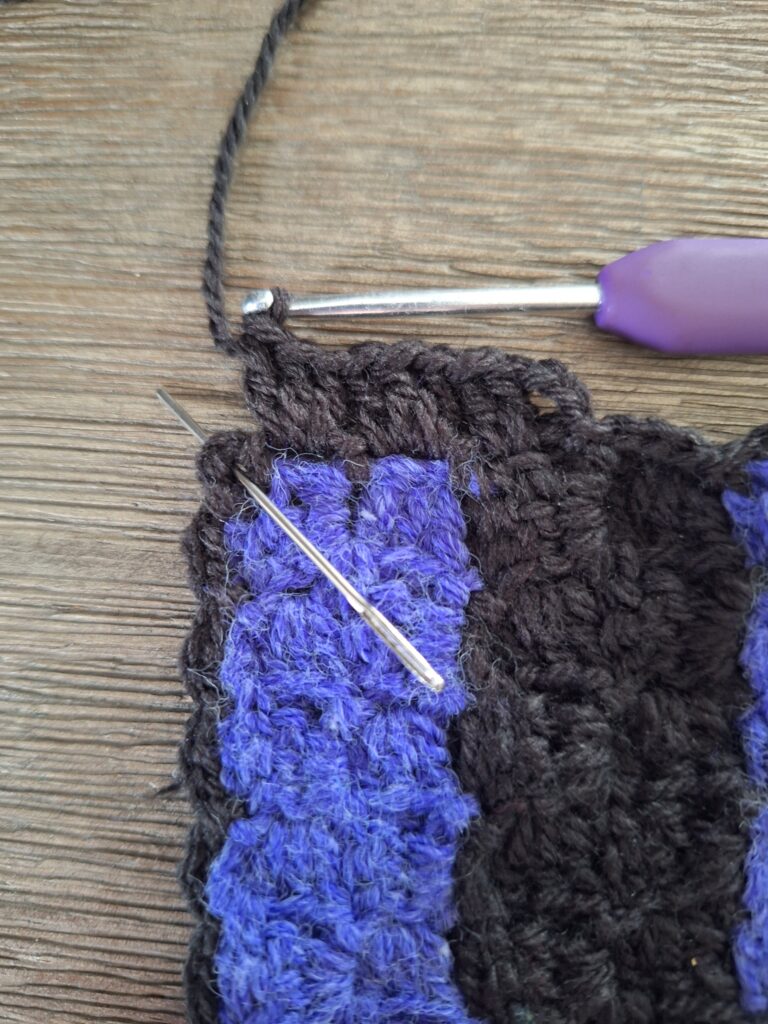
.......(all in the same space, see needle).
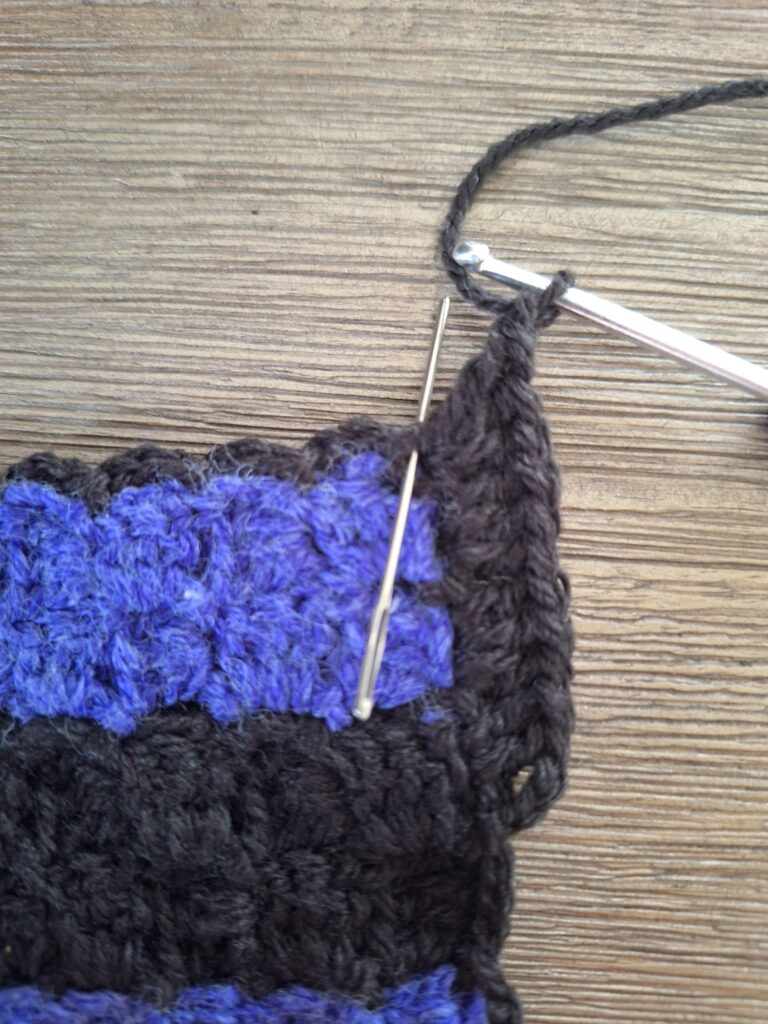
In the next chain space, make 3 double crochet (see needle)
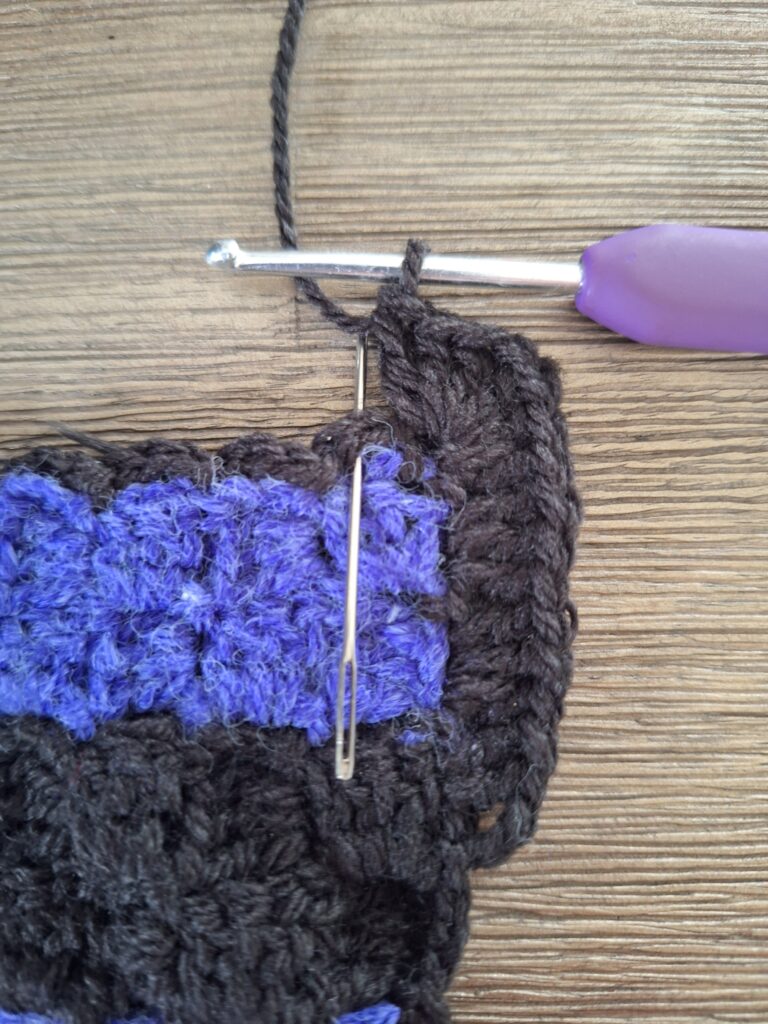
Go around the blanket with 3 double crochet into each chain space and with (3 double crochet, chain 1, 3 double crochet) into the corner space.
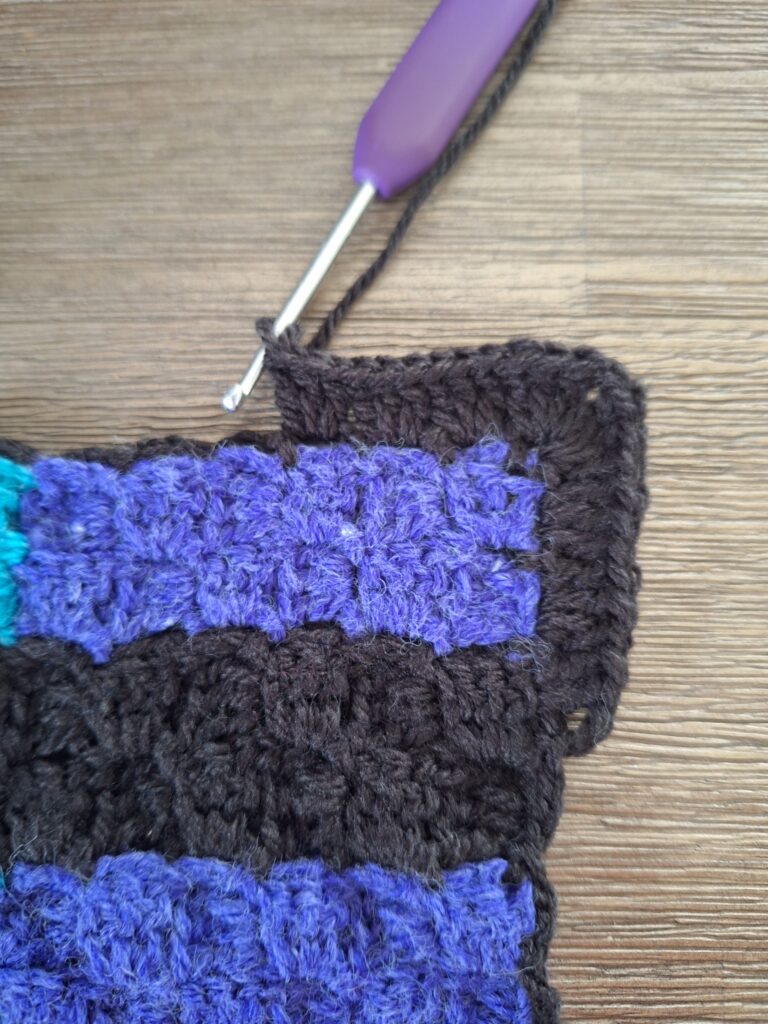
Close this round with a slip stitch into the third beginning chain.
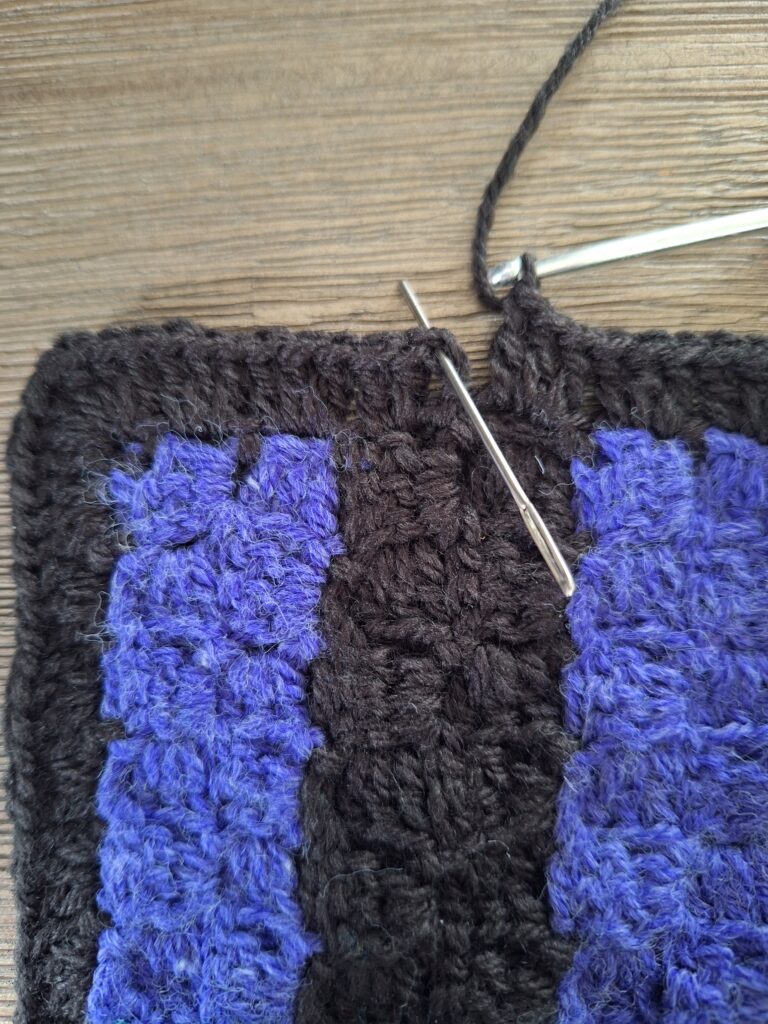
Round 3: slip stitch chain space round
Chain 3, skip 2 double crochet and make a slip stitch in between the third double crochet of the same block and the first double crochet of the next block (see needle).
In this round, your slip stitches will "stack" above those in round 1. You skip the three double crochets and make your slip stitches between the blocks.
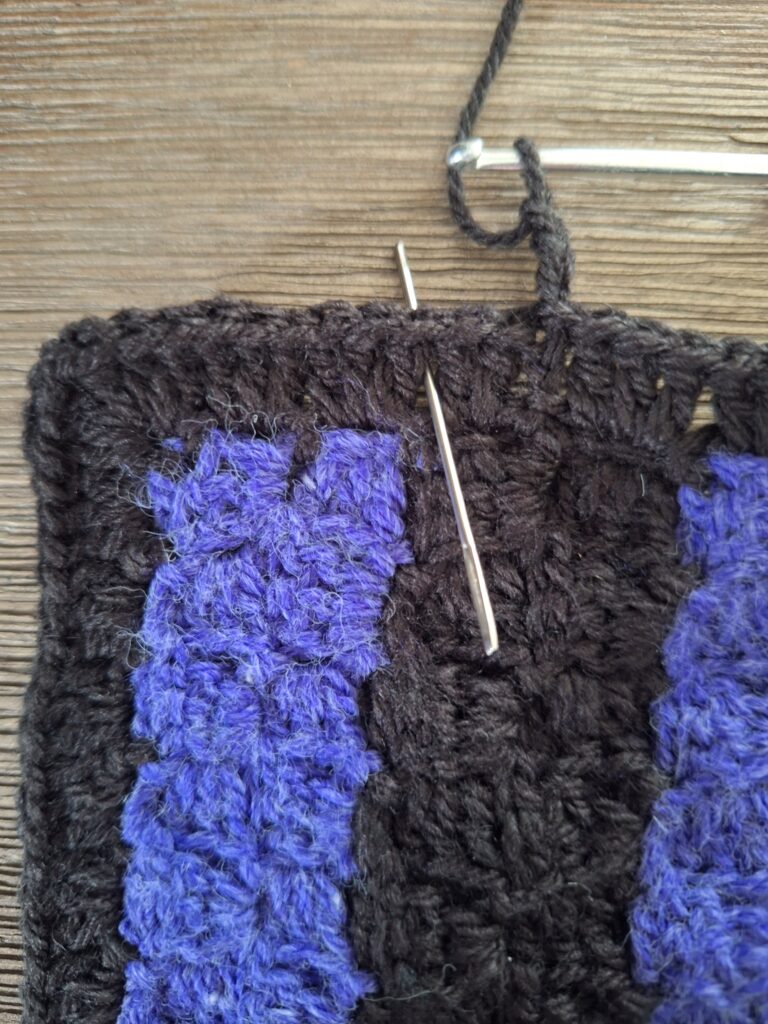
Chain 3, skip 3 double crochet, slip stitch in the "space" between the next 2 blocks (see needle).
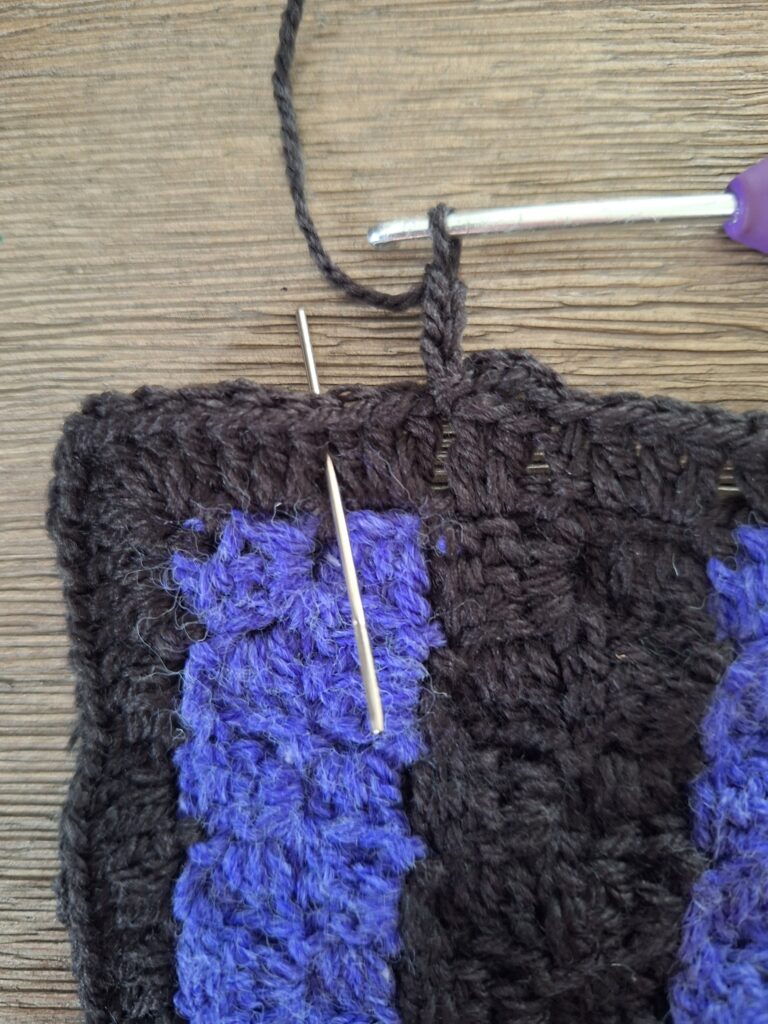
Keep going, chain 3, skip 3 double crochet, slip stitch between 2 double crochet.
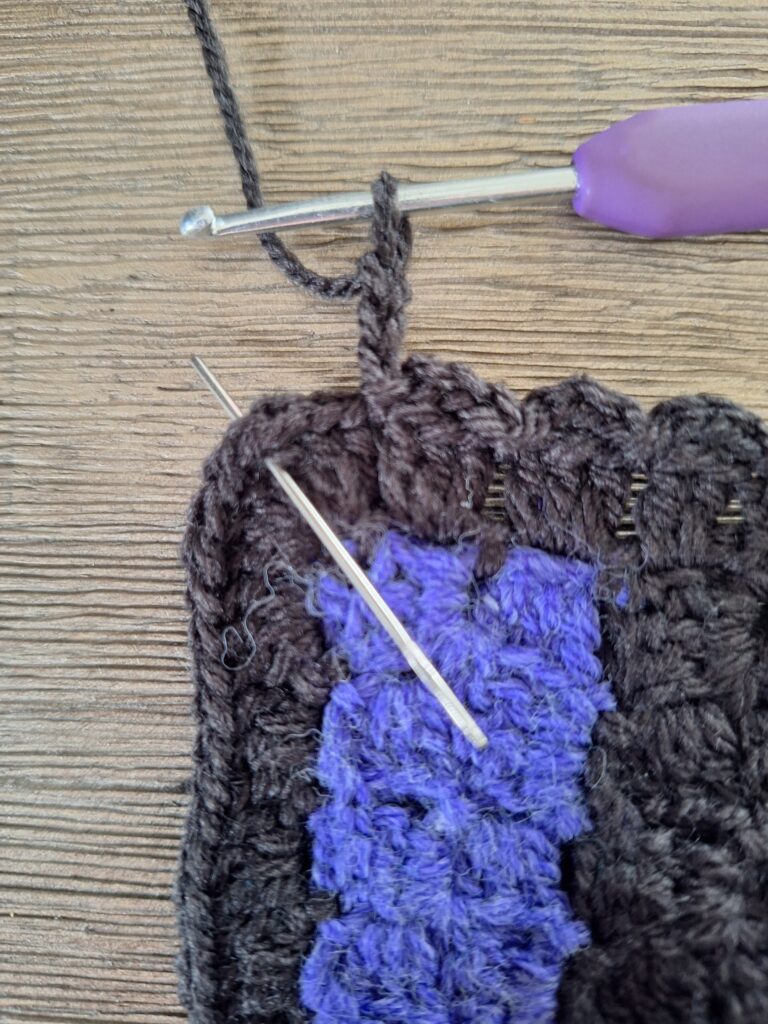
In the corner: slip stitch in corner, chain 3, slip stitch into the same corner space (see needle).
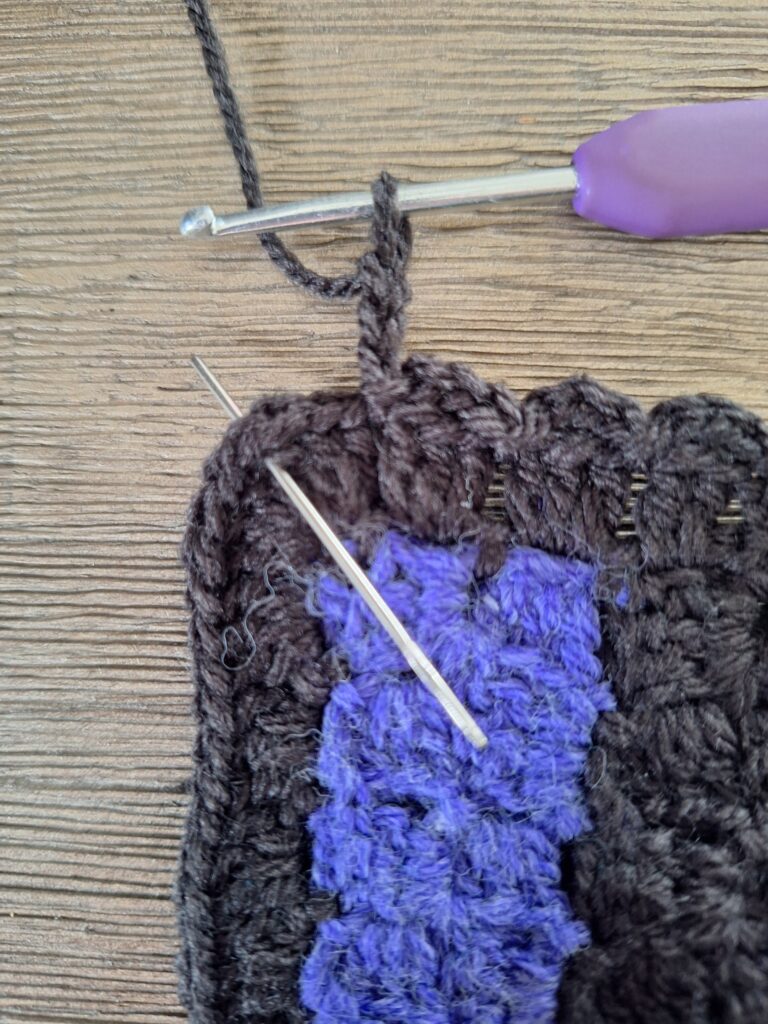
Chain 3, slip stitch in chain space of the corner
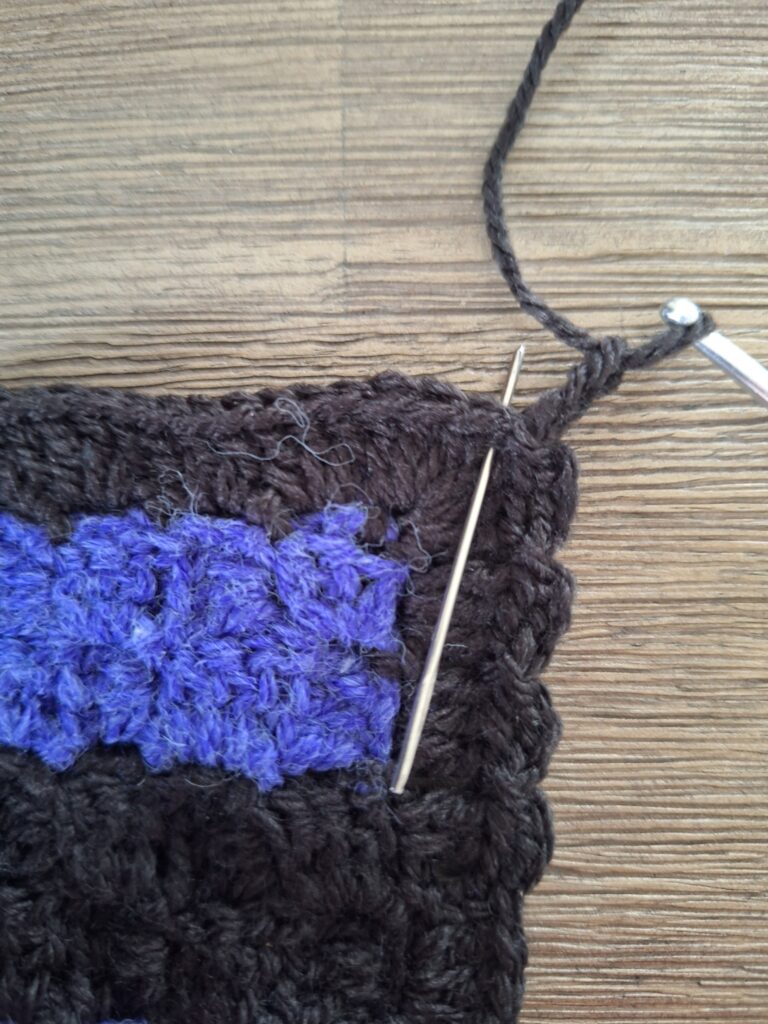
Carry on: chain 3, slip stitch between 2 double crochet. In the corner: slip stitch, chain 3, slip stitch in that same corner space.
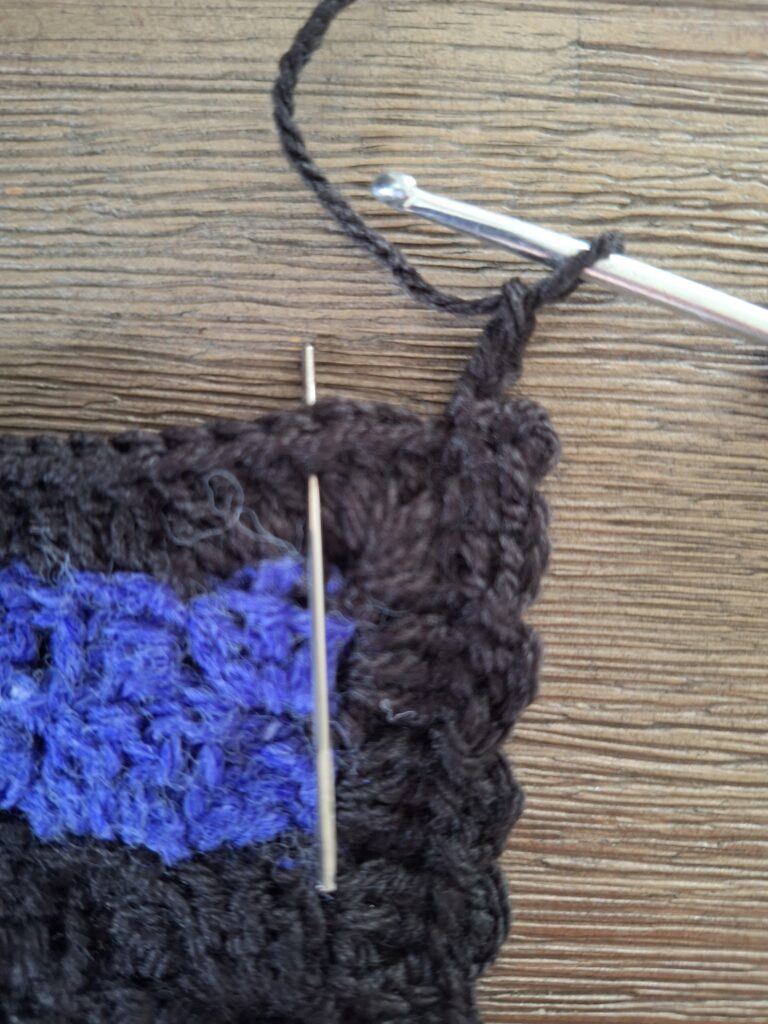
After the last 3 chain, you make a slip stitch into the first 3 chain space of this round (see needle).
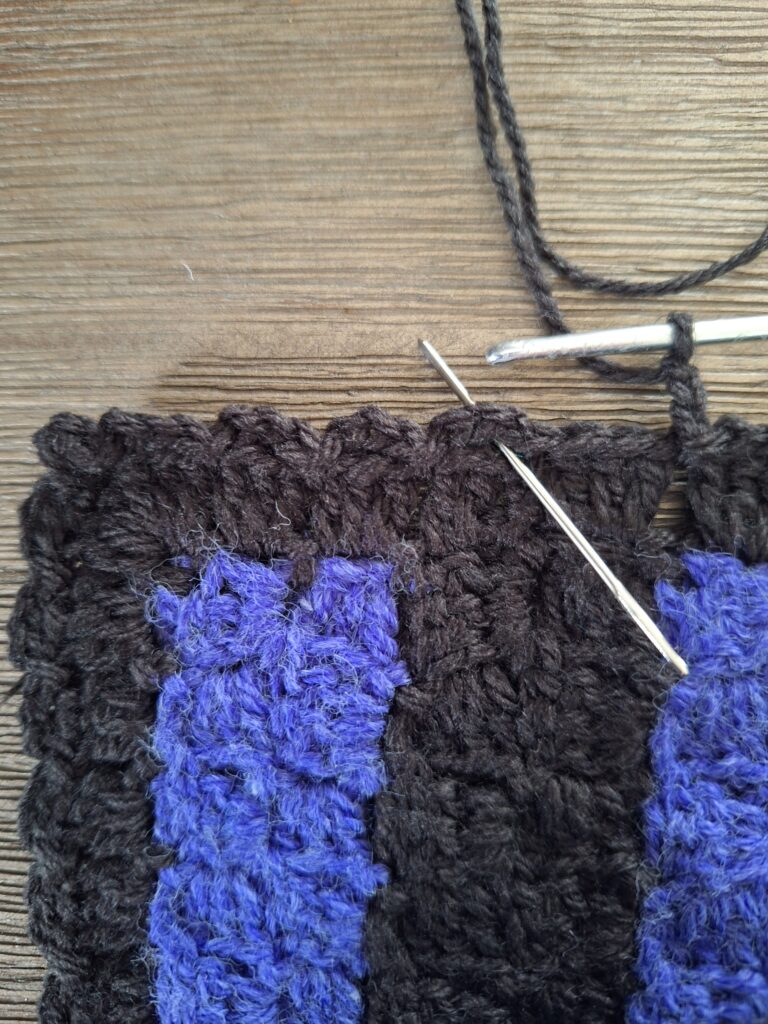
Round 4: second double crochet round
Chain 3 and make 2 double crochet into the same space (see needle)
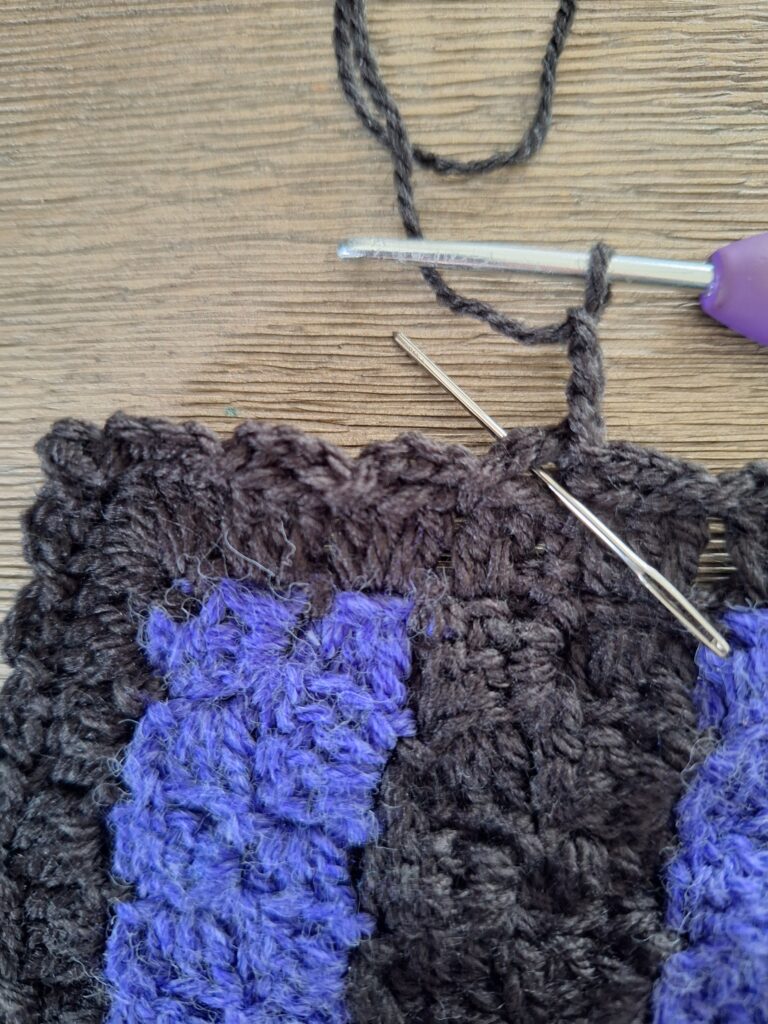
Make 3 double crochets in to each next chain space. In the corner, you make 5 double crochet or, if you want, (3 double crochet, chain 1, 3 double crochet).
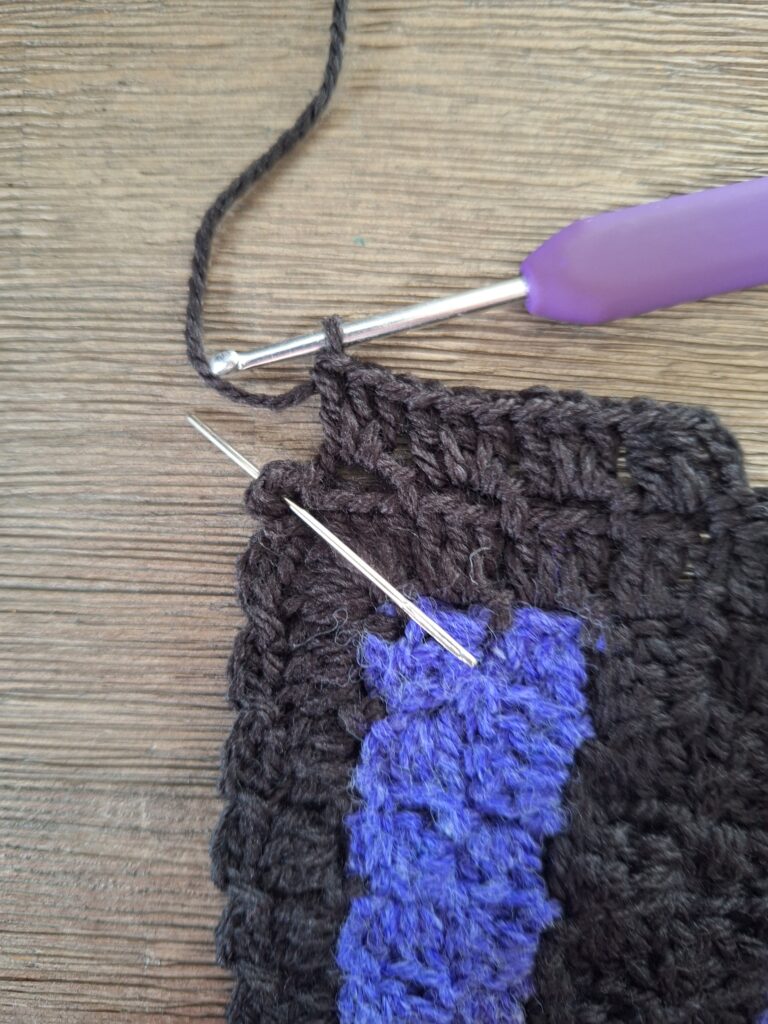
3 double crochet into the next chain space (see needle).
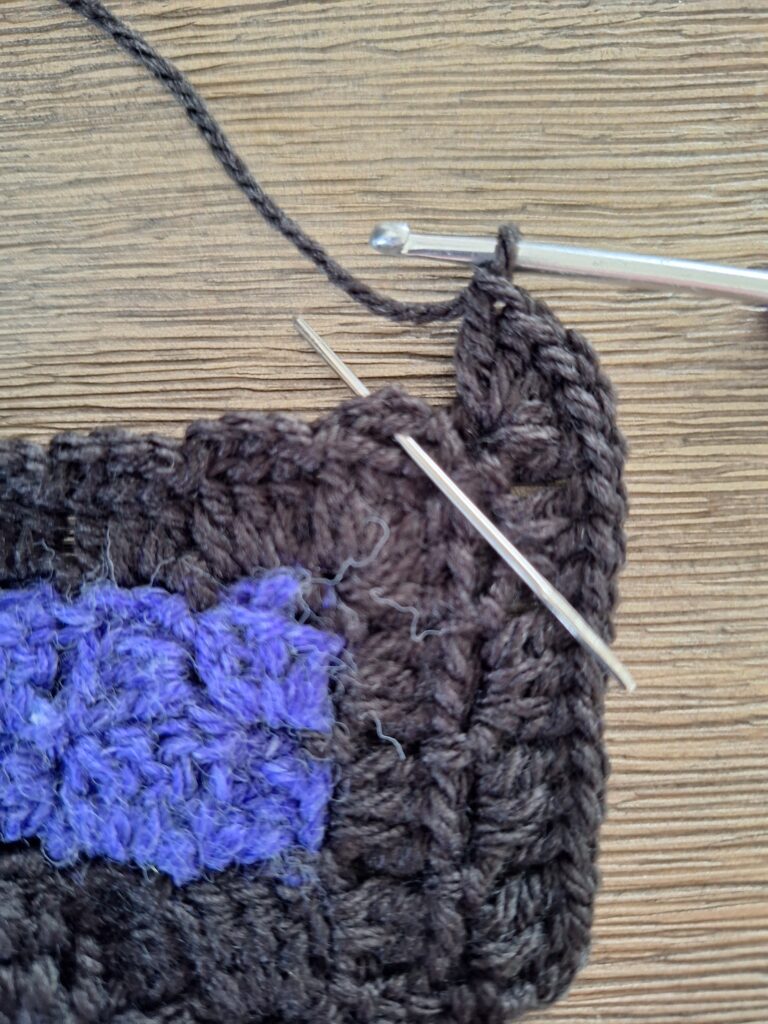
Keep going, 3 double crochet into each chain space, except for the corners.
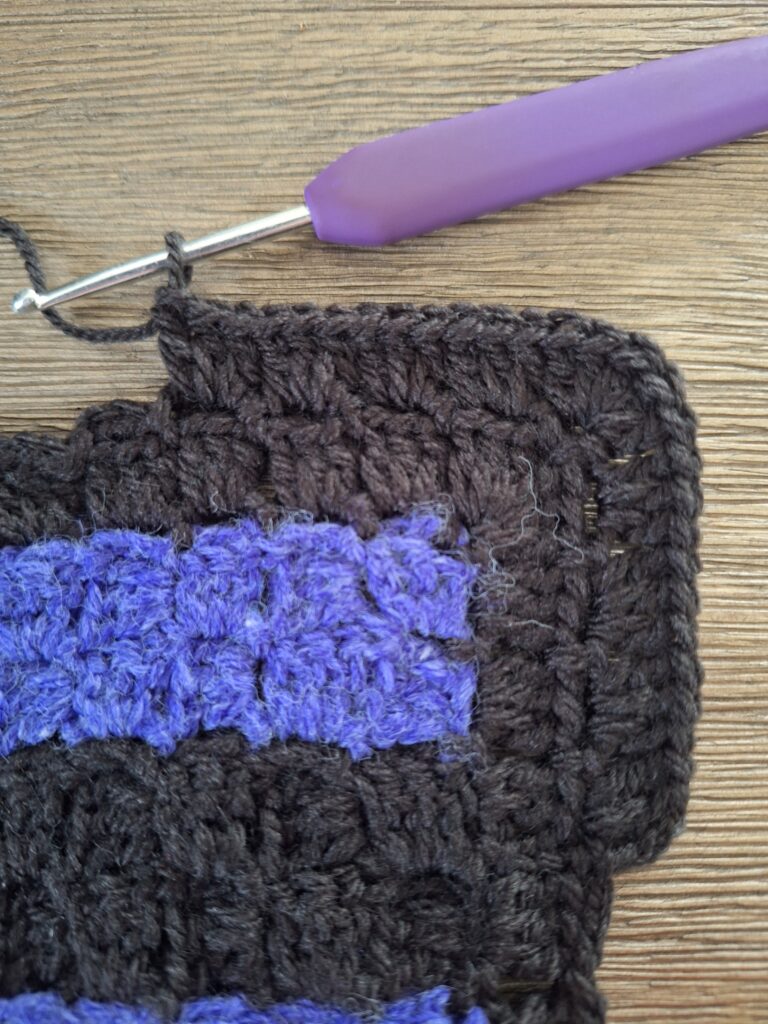
Slip stitch into the third beginning chain (see needle). Or fasten off invisibly!
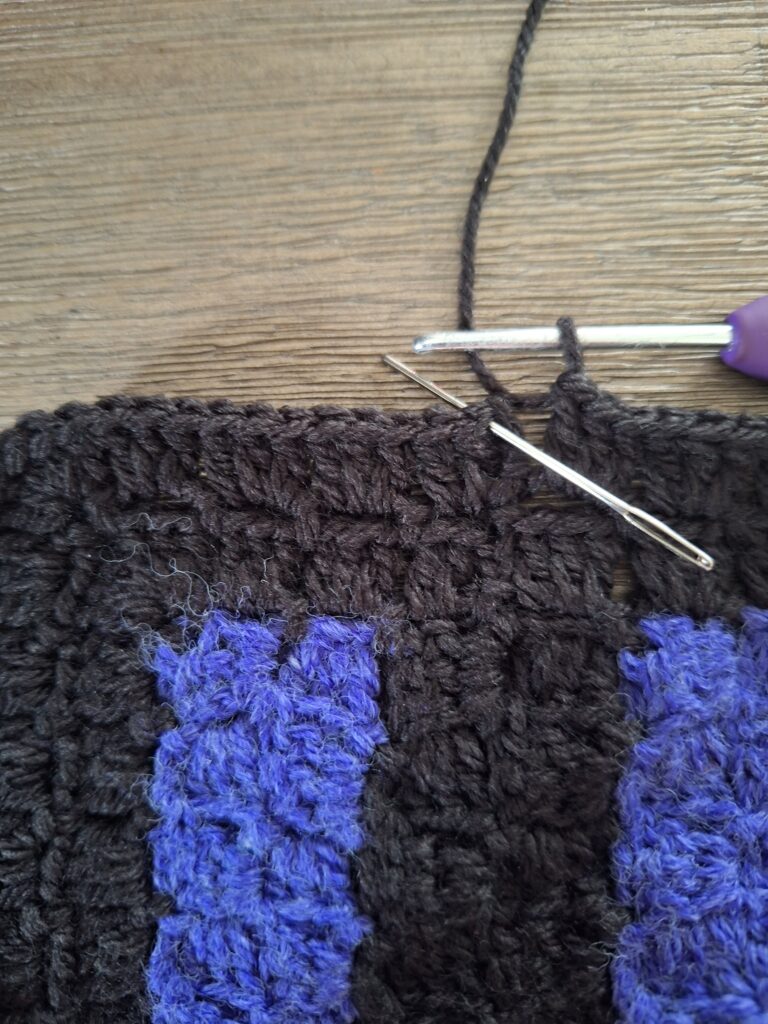
Cut the yarn
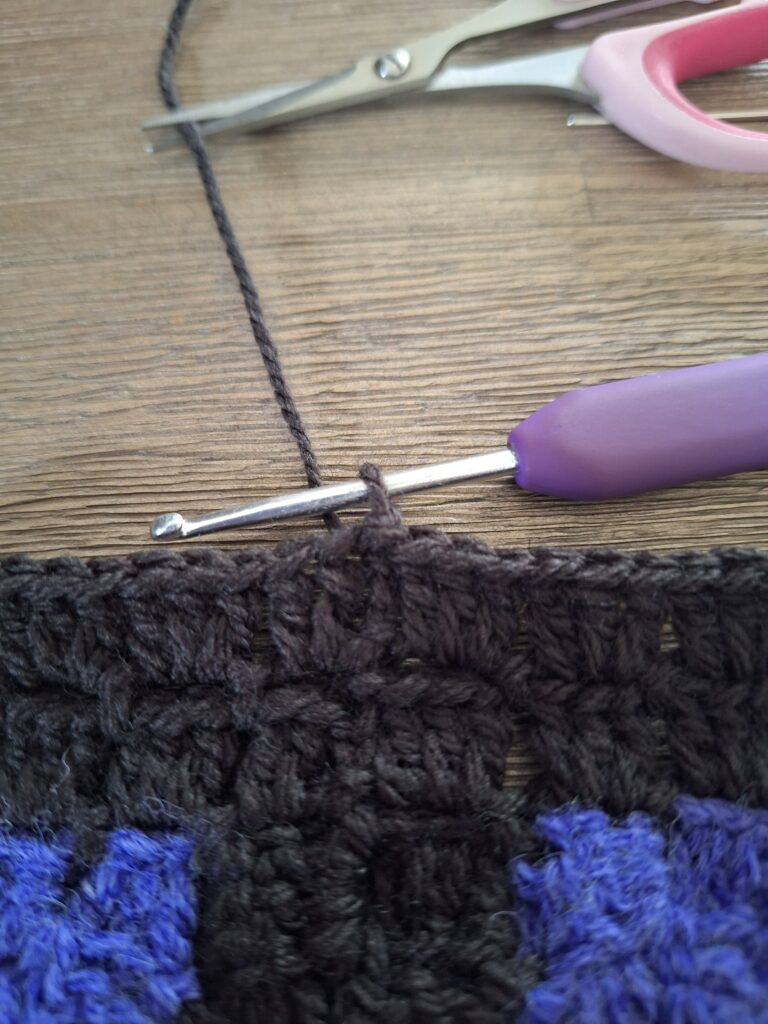
Pull through, darn away the end.
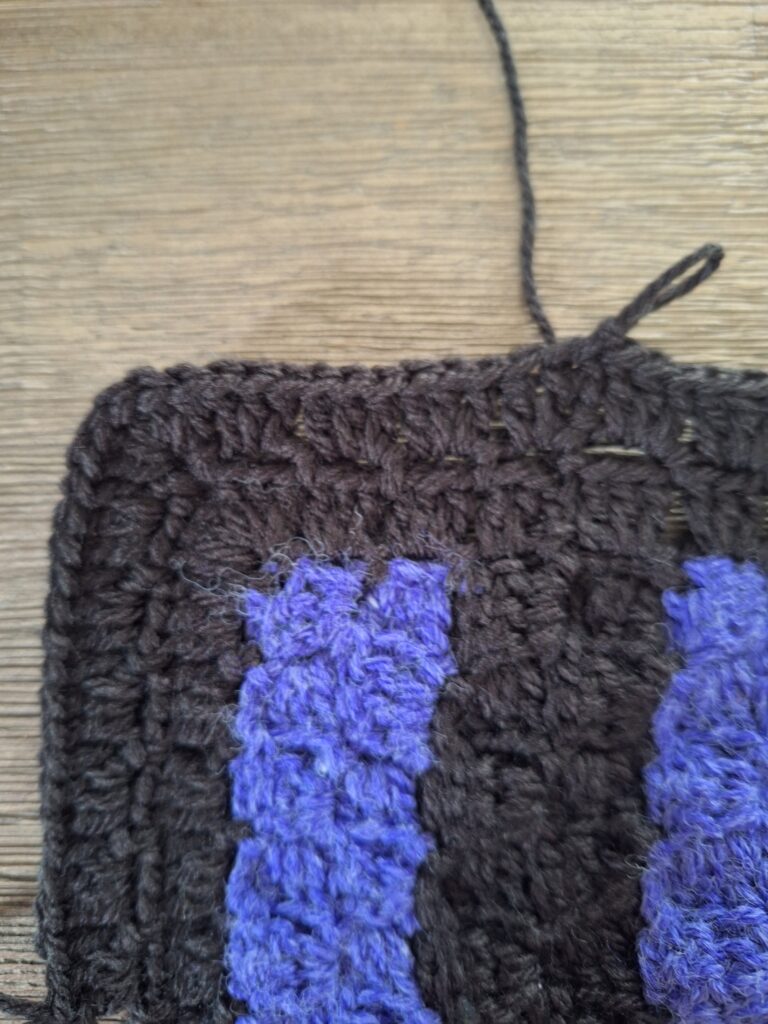
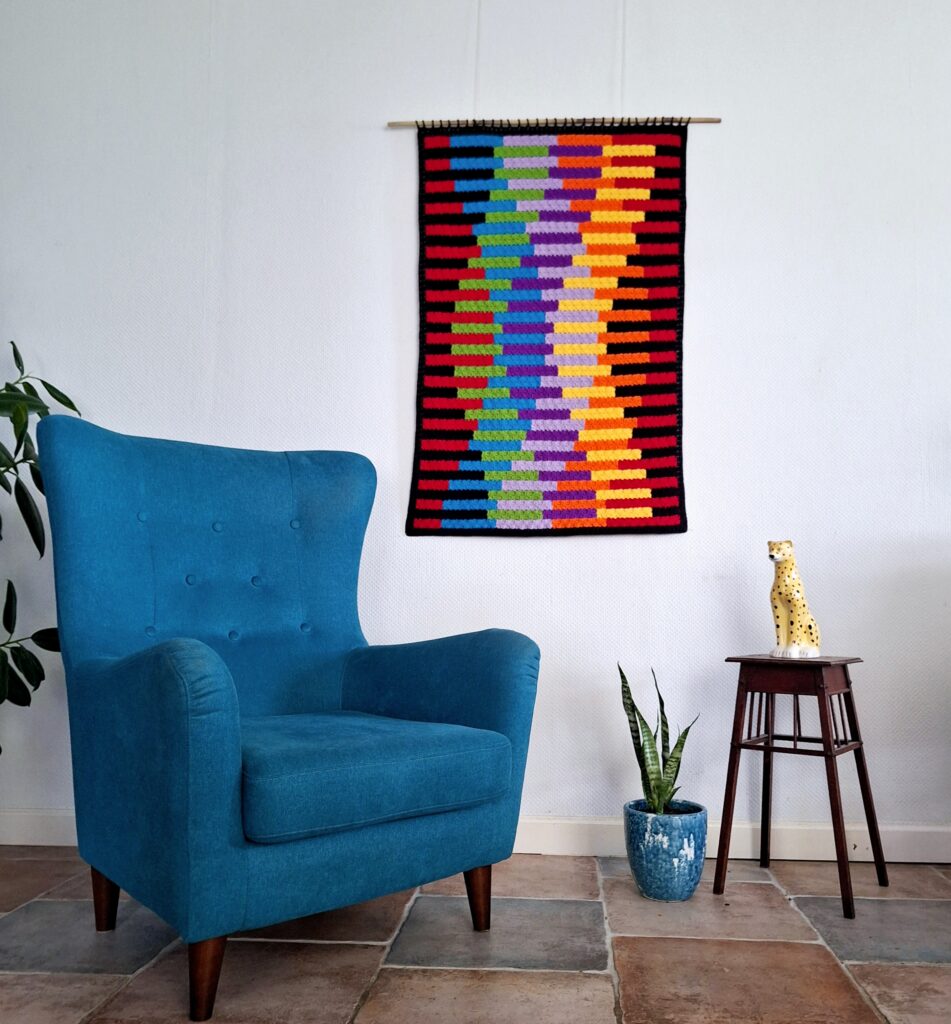
Your project could be done at this point, and looks like this:
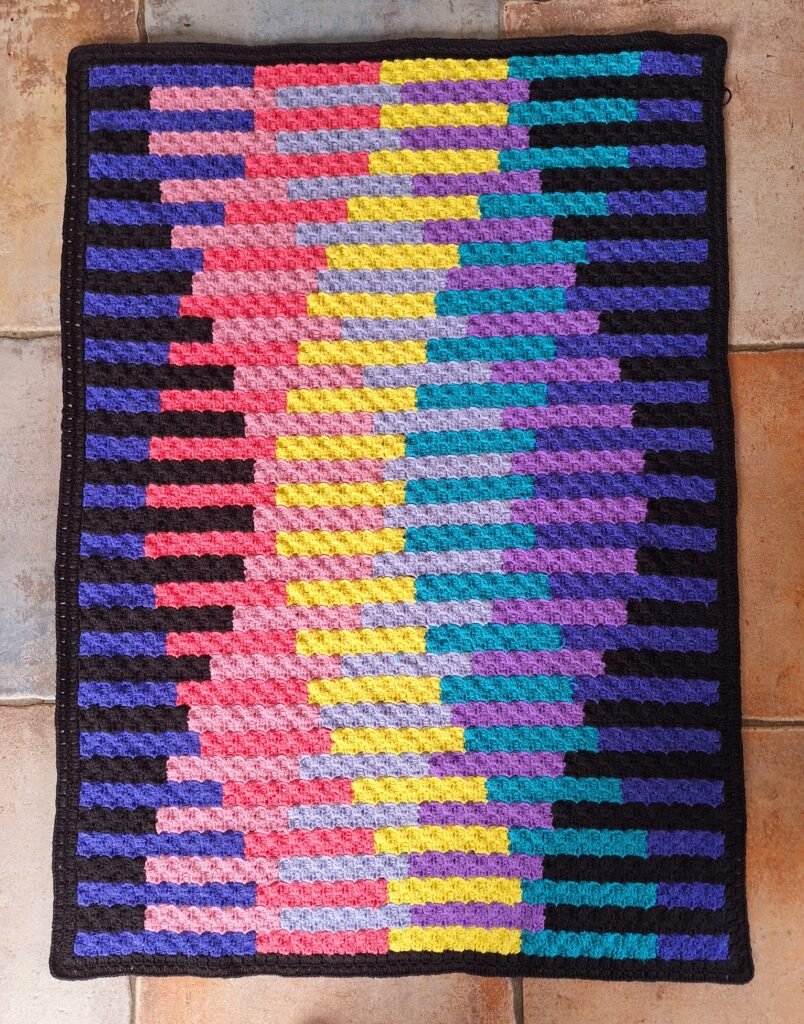
Hanging system
Buy a round stick with a diameter of 12 millimeters at the hardware store. (Approximately 3 euros for
a meter in the Netherlands). Saw the stick to the desired length. Another stick size is also possible,
then choose method 2 of the hanging edge.
There are two different versions to make a hanging for your project. Method 1 suspension, for a 12 mm stick: attach in the top right corner with a standing treble. Then crochet *2 chain, skip 2 stitches, double crochet in the next stitch. Repeat from * until the top left corner. Fasten off and weave in ends. Move your rod up and down between the double crochet stitches and use some fishing line to attach it to the wall.
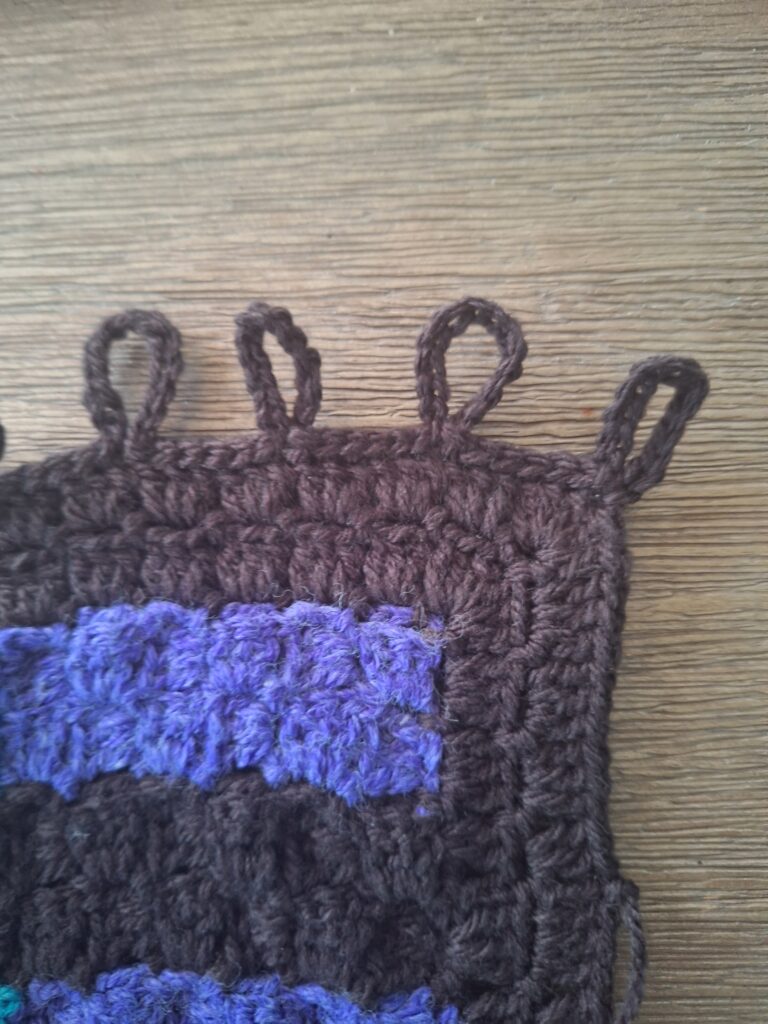
Method 2: chain loops made to fit, for chosen sized rod
Use crochet hook size 3 mm
Start in a double crochet in the corner, make a slip knot and pull through. Chain as many chains as you
need to fit snuggly around your rod.
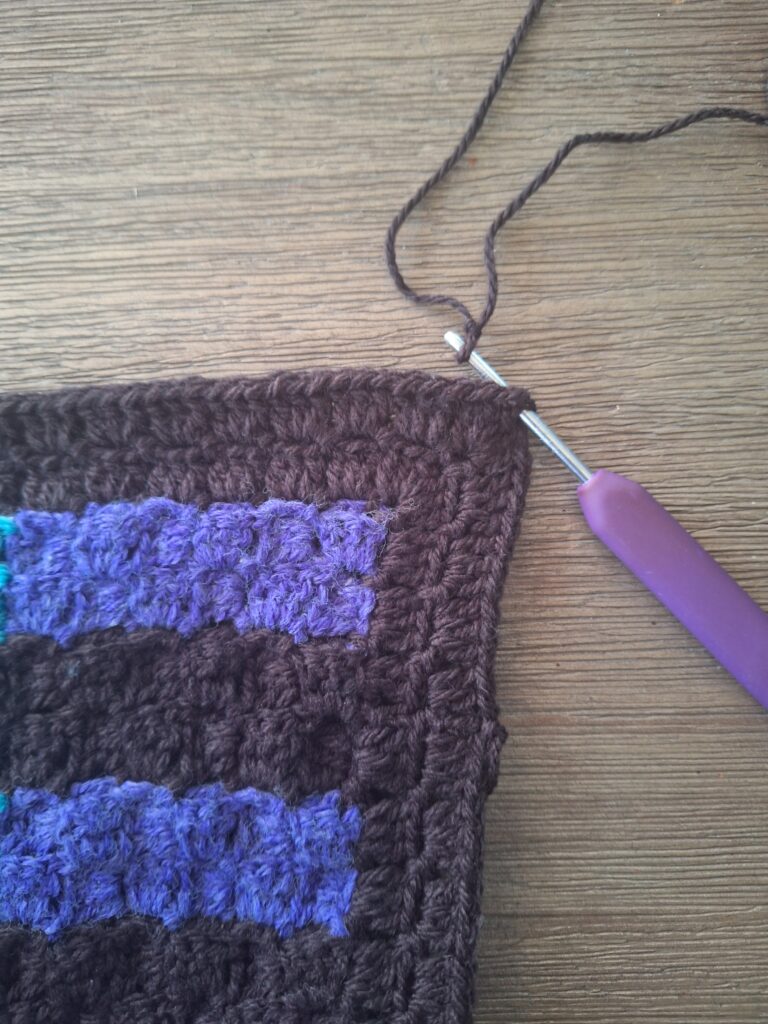
Slip stitch into the same hole as where you started (see needle in the picture).
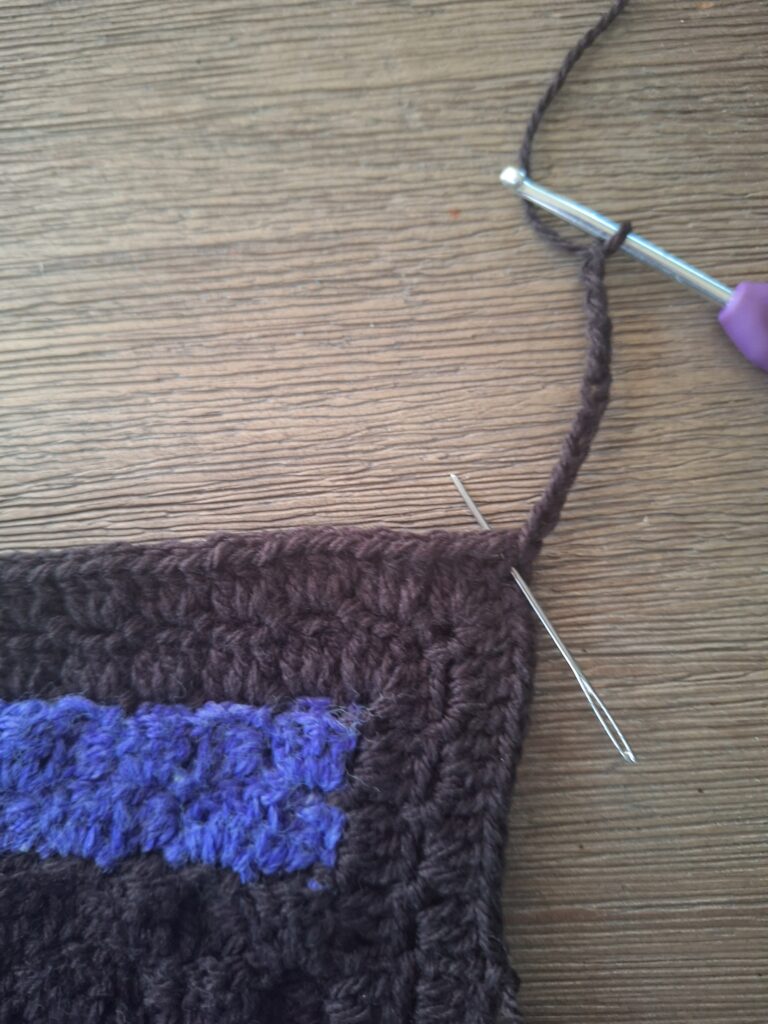
You’ve made your first hanging loop.
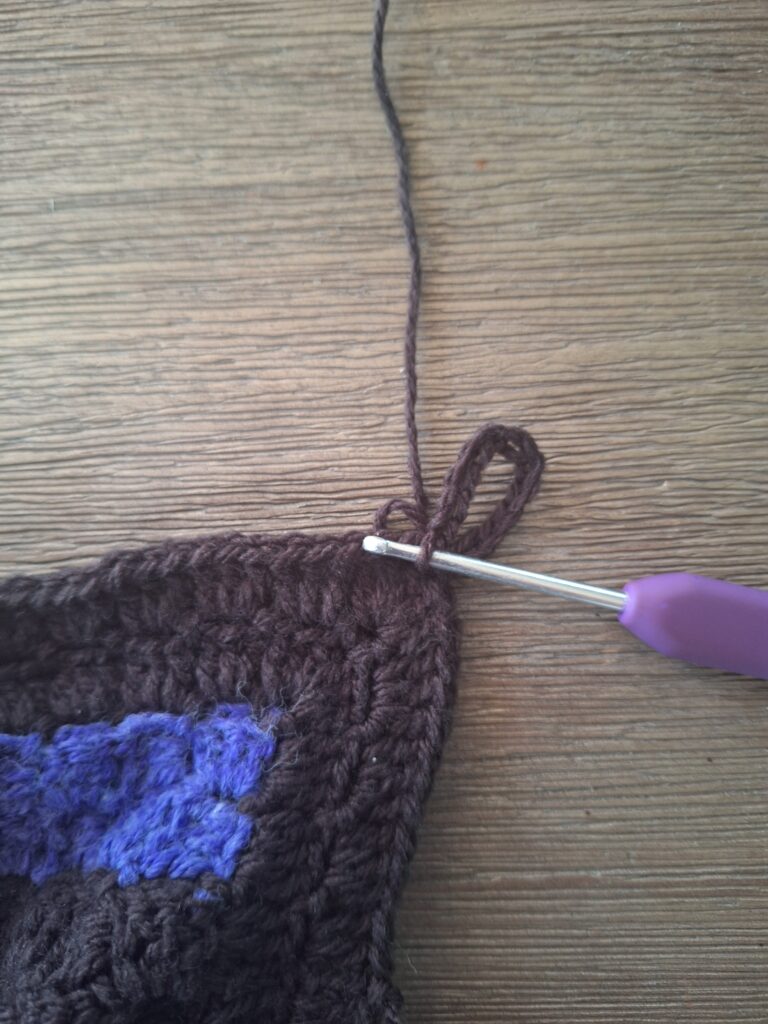
Slip stitch into the top of the next double crochet (see needle).
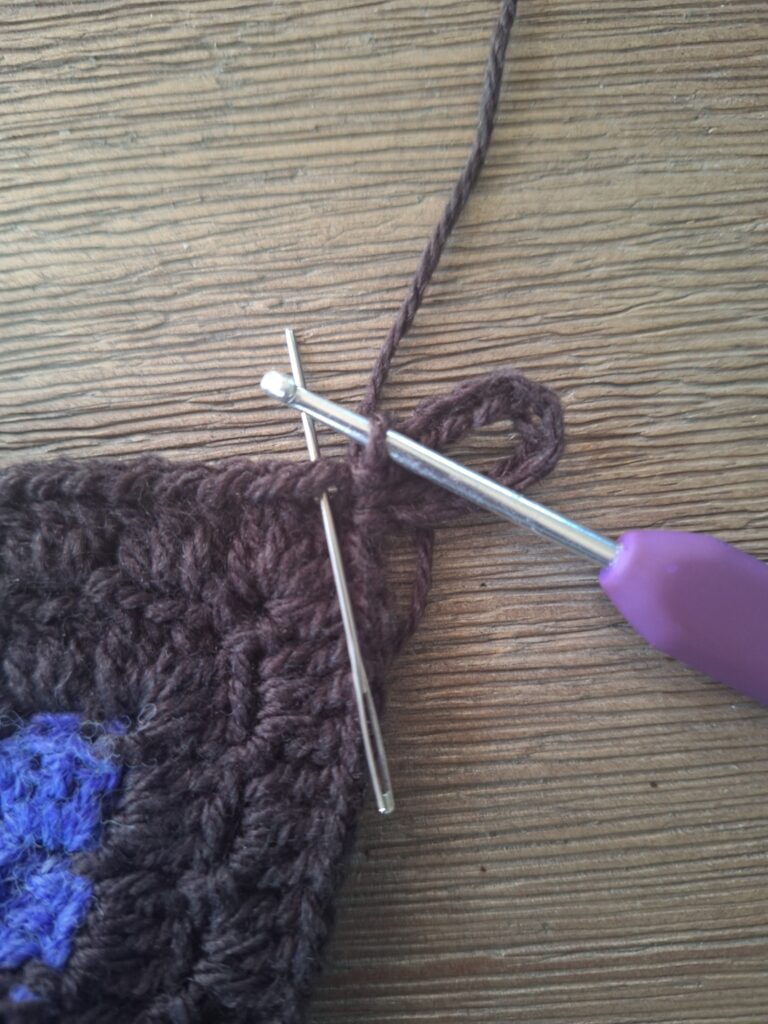
Slip stitch into the top of the next double crochet, repeat a total of 6 times
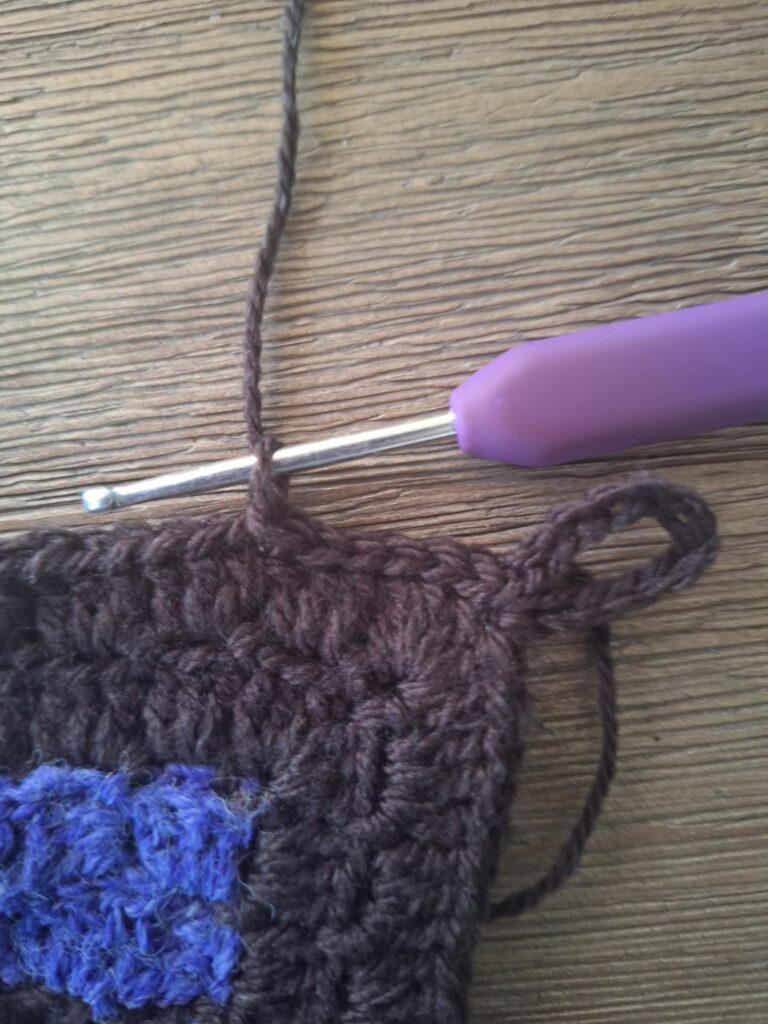
Make the same amount of chains as for your first loop. Slip stitch into the same stitch as where you started.
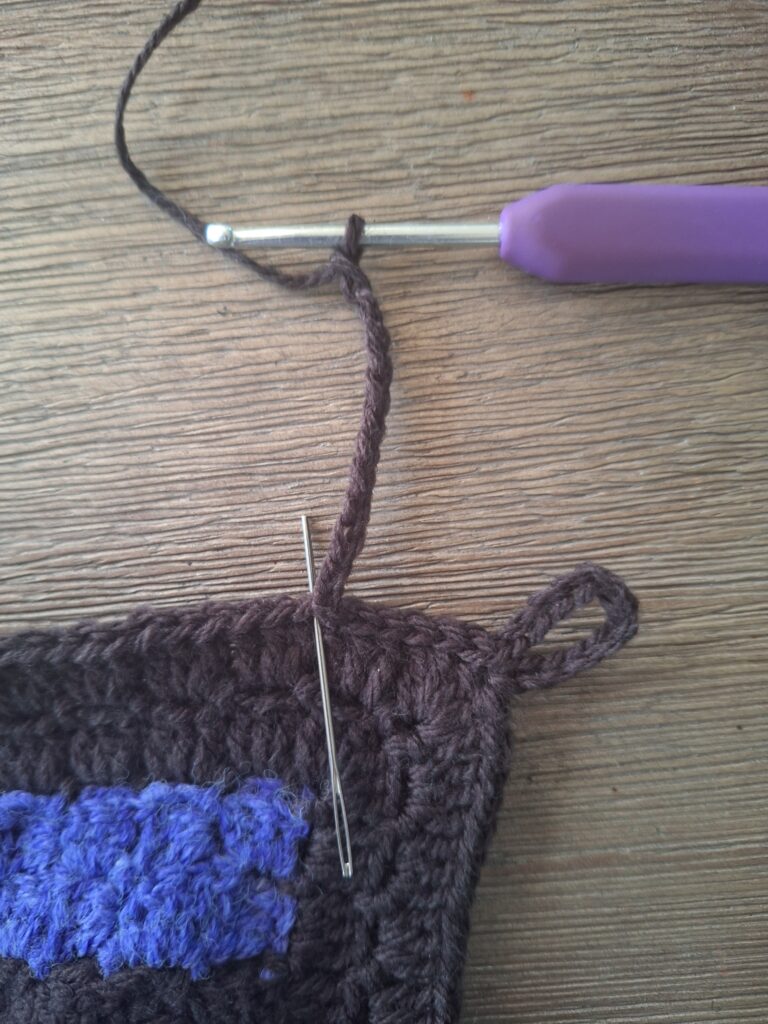
Repeat the loops and slip stitches until your top of the project is finished.
Ta-dah!
Link List Scheepjes Crochet in my DNA MAL
- Nederlands
- English US
- English UK
- YouTube
- YouTube Channel
- Nederlandse Proeflapjes
- English Swatches
- YouTube Channel
Veelgestelde vragen
Who designed the Crochet in my DNA MAL?
The Scheepjes Crochet in my DNA MAL is a project by Hook to Hook and Een Mooi Gebaar.
What do you make in week 4?
The border, and an optional hanging system for the finished piece.
Which hook and colour are used for the border?
The border is crocheted with a 3 mm hook in colour black 301.
Are there video tutorials?
Yes, there are video tutorials for both left-handed and right-handed crocheters.
Is this the UK or US version?
This page uses US terminology. There is also an English UK version and a Dutch version.
Vond je dit een fijn patroon?
In de Een Mooi Gebaar Club vind je meer dan 400 patronen als PDF, meer dan 15 videocursussen voor links- én rechtshandigen, een Steek-o-theek en elke week samen haken. Zo komen je projecten nu echt af.
Vanaf €25 per maand · 14 dagen niet goed, geld terug
Finishing Friday: een heel jaar Club voor €199
Deze Black Friday koop ik niets, ik maak iets. Maak af wat al in je kast ligt en haak in december cadeautjes van je restjes, samen met de Club. Meer dan 400 patronen als PDF, alle videocursussen en elke week samen haken. En €199 blijft je prijs.
Alleen van vrijdag 27 tot en met maandag 30 november · 14 dagen niet goed, geld terug

Creatieve, enthousiaste en lieve Iris van Meer is het gezicht achter Een Mooi Gebaar en vertaalt, ontwerpt en deelt meer dan duizend haakpatronen met jullie op dit stukje internet.
Mijn verhaal, over hoe ik van onhandige knutselaar toch nog creatieve ondernemer ben geworden, lees je hier: Mijn Verhaal
Als je contact met Iris wil opnemen, ga je naar de contactpagina

Creatieve en dynamische ontwerpen die ontworpen zijn om je te inspireren en je haaktechniek uit te dagen. Met deze helder corner to corner patronen zet je in een handomdraai iets unieks op de naald.